Wednesday, 3 October 2012

Blood Bowl Match Report: Skull 'n' Skinks vs Stirland Dockers

Last Sunday, after four years of trying, I finally managed to persuade my wife to sit down to a game of Blood Bowl. Helped by the fairly spare attendance on the first day of the Lead Legion Blood Bowl League's second session (Half the players forgot we were playing) and the fact she's recently fallen in love with Skinks, we were able to convince her to try her hand with Adam's Lizardman team in a friendly.

Given that Caroline was a complete newcomer to the game, I created a fairly unorthodox Lizardman team: 4 Saurius, 7 Skinks and FOUR re-rolls to help her overcome the inevitable newbie mistakes. Adam also agreed to help coach Caroline for the first half-dozen turns. Although I'm playing a Nurgle team in the League, Nurgle team's have a preponderance of special rules and aren't really suitable opponents for a beginners first game so I brought my human team out for a friendly.

Beginner's Luck?

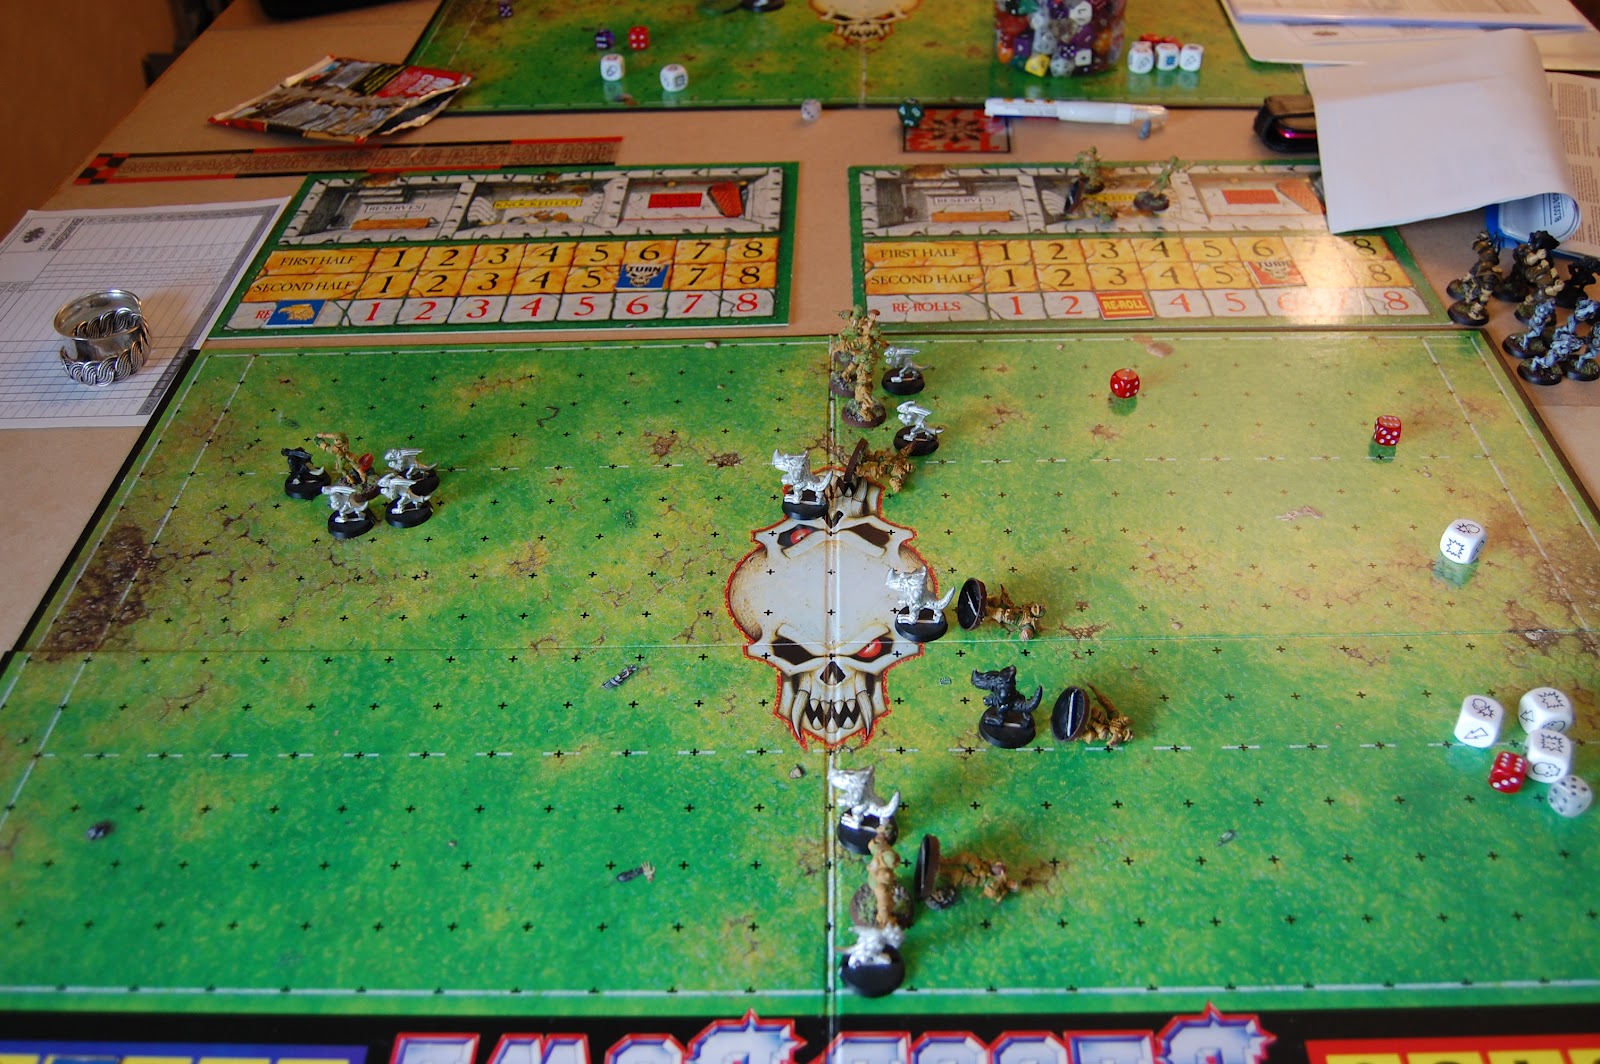
Going by this pitch invasion, the humans must be playing away!

Right from the first, Nuffle smiled on Caroline when I rolled a 12 on the Kick-Off table. The resultant pitch invasion left we with just three players on their feet and eight lying strewn across the pitch in a stunned state. Caroline lost just one player, a Saurius, and had a clear path through my lone of scrimmage to the ball.

Fortunately, that was the last bit of luck she had for a while. I managed to hold her off -just- through some pretty damn skilled play (even if I do say so myself -and I do, a lot) until her Turn 4, with the ball trading hands several times.

First Blood:

Score 1 for the scaly-boys!

But alas, despite a brave defence, the inevitable soon happened. A very nice throw from one skink to a teammate loitering in the human end-zone resulted in what would turn out to be the first of many, many touch-downs.

More Pain:

Not again! I bet it was the same darn Skink too!

A turn later, a rash running play by me left a Stirland Catcher eating dirt and an opportunistic skink with possession of the ball. Demonstrating why a well-handled Skink team is both a thing of beauty and something to be feared, Caroline had her second touchdown on turn 6. Satisfied that his job here was done, guru-Adam departed to leave Caroline to play on alone.

It was! It was the same bloody skink! Good thing this is just a friendly!

Reversal:


A successful throw from a human team? It does happen. Sometimes.
With just two turns left in the half I knew I had to pull something out of the hat. I feinted to my right (top half of the photo) while sneaking a catcher through on my left on turn 7. On turn 8, after drawing Caroline's reserves out of position and then switched the ball to the right and made the throw to score! 2-1 to the Skullin Skink's at the end of the first half! Don't let the position of the ball in the photograph throw you off. He made the catch. Honest!

Second Half:

In a good position at the end of my turn 9
 Capitalizing on my successful diversion at the end of the first half, I set up my team as though I intended to repeat the same play, but on the other flank. This time, it wasn't a diversion though. Caroline didn't shift her reserves this time. I risked an interception to pass the ball over her line of scrimmage and finished in a good position to score. The fly in the ointment was the Skink Caroline had positioned in her end zone for "deep defense". Actually, it turns out she'd gotten confused and thought she could score by getting the ball into her own side of the pitch, but I'm too much of a gentleman to mention that the Skink was really mooching in the hope of scoring an own goal (and here I thought she was being damned clever)!

That's not a baby you're cradling, son!

Honors-Even:

Who let that giant into the stadium?

Despite a brave attempt by a pair of skinks to bring down the catcher, it was not to be and the laddie managed to find his way to the end zone to score touchdown number two (for the humans) in Turn 10. But Caroline wasn't down, and she certainly wasn't out. The tide was about to turn yet again.

Cold-Blooded Revenge:

Disaster! The outraged lizard fans invaded the pitch for a second time in protest at what was clearly an off-side touchdown! This time, five of the brave Stirland lands managed to fight off the scaly horde and stay on their feet. The visiting human fans did their best but it wasn't enough! Only two lizard players were stunned, leaving the visiting team outnumbered 9-5.

Dammit, what are they invading the pitch with? Giant Parrots?
Why yes! Yes they are! Thanks Bruce. Why don't you go throw Adam's dice somewhere else?

Number Five is Alive (and a Lizardman, apparently):

Touchdown number three for the Lizards wasn't long in following a 14 week old Giant Parrot's rampage! A different skink ran the ball in to score on this occasion, tearing through the human lines on the lizardmen's turn 11...
The Skinks are facing backwards because we always turn a player round after activation, to avoid accidentally activating the same player twice in one turn.
and then score on their turn 12...
That bloody skink again!
and leaving a trail of destruction in their wake:
They're not stunned, they're on Parrot Watch, honest.

Stirland Resurgent:


Not about to be beaten by a beginner (a girl, of all things and my wife at that!) I lined the boys up and gave them a stern talking too (earning some funny looks in the process). But it didn't look good when the Lizardmen delivered a perfect kick that left the ball sitting in my very own endzone. I had to drop my thrower way back to pick up the ball (contrary to my wife's claims, I was NOT trying to score an own goal. I leave that sort of thing up to her -although mentioned this again on a public blog is probably scoring an own goal of a different kind).
It's lonely back here....

Bombed Out?

Conscious that I had to score twice to win, I took the risk of a long bomb throw to the Catcher on my right. As is usual for me, when I really need something to go right, it goes wrong! But it wasn't a total loss. Catcher-boy dropped the ball, but fortunately it bounced right onto an escorting Blizter and got stuck on a helmet spike or something because, wonder of wonders, he actually managed to catch it despite being in a Skinks tackle zone!

Wot just bounced on my 'ed?

Knock Out Blow:


Alas, why my dumb-ass Blitzer was skipping about celebrating, he got mugged by a mob of Skinks and knocked himself out hitting the ground. Or something. Couldn't have been those little guys that did it. No sirree!
Spot the conspicuously empty square where a blitzer should be.

Back and Forth:

There followed a small but vicious brawl over possession of the ball. No rat-catchers or their mangy mutts were involved but eventually a Stirland Catcher (of all things) won the ball and made a break for the end-zone...
All your ballssss belong to ussssss!

Leggit!
 only to be caught and mobbed by no less than FOUR skinks!
Mummy!

TOUCHDOWN!

Clearly however, Nuffle was with this brave lad, for not only did he manage to shake off the four-skink tackle, he managed to score as well! 3 all with two turns to go! What a guy!
I'll turn yarz into boots!

Obviously a lad who eats his Spinach. Now. Why were you so crap in the last league number 7?

The FINAL SCRIMMAGE!


With two turns left on the clock, both teams have everything to play for. After all, a two turn touchdown is well within the realms of possibility for either time. Oh eck. Nail-biting stuff. Stirland kicks to the Lizardmen -and the ball drops right behind their line. The result is another vicious brawl for possession. In turn eight, the lizardmen finally seize the ball. All is lost for the humans -their turn eight has been and gone. It's all down to the dice now. First the lizards need a pass...
Booyah!
...and they make it. But it cost's their re-roll. Now they just need two go for it's. They get the first, they roll for the second and.....

IT'S DISASTER FOR SKULL 'N....

The lizardmen roll a one, just one single square from the end-zone and a 4-3 victory over the humans. Brian (that's me by the way) sighs loud and deep. Partly from relief that he didn't lose to his wife in very first game of Blood Bowl (he'd never hear the end of it, and his home or Adam's) and even more so because Caroline loves the game. It was at this point that she named her team the Skull'n'Skinks and pledged to join the League.

And what a classic Blood Bowl ending to a truly classic Blood Bowl Game.


Monday, 1 October 2012

Blood Bowl Convert

My wife Caroline played her first game of blood bowl yesterday! 3-3 on the last turn of the game, she needs two go-for-it's to win and rolls a 1 on the second go-for-it! Classic Blood Bowl moment. Now she loves the game. She's already named her new team "Skull 'in Skink"!
 We took some photographs of the game, so look for a play report in the next few days.

Thursday, 6 September 2012

Steel Legion Battle Report


The Steel Legion Mechs deployed for battle.
Following on from their successful recon of the Capellan Base on Stein's Folly, the Steel Legion returned to the base for a raid-in-force. The Steel Legion players came along to help Dougal run the Op-Force on the Fox Hounds' last mission, so three of the Fox Hounds came along to return the favour by playing the Opfor in this mission.


Mission Set-Up:

Contract Registry: FS-OC-07-08 - CONTRACT COMPLETE
Unit Assigned:STEEL LEGION
Working for the: Federated Suns
In the: Federated Suns
To complete the following: Supply Raid
System: Stein's Folly
Forces Recommended: 1 Lance
Contract Duration: 1 Month (15 Days in REAL TIME)
Employer Contact: Federated Suns: Field Marshal Ran Felsner
Jump/Drop Fees: 75 WP
Pay Rate: 250 WP
Support: Medium Demi-Lance
Salvage Rights: Low
Command: Independent

You are requested to retrieve Capellan supplies for the 5th Crucis Lancers. Scan all buildings located at a possible Capellan supply depot on the outskirts of the city of Travis - retrieve any and all available supplies. Cripple or destroy any garrison mechs or defenses.

Satellite Data:
Additional mission intelligence via local MilSat available. Costs accepted.

Milsat scans show that current base garrison has been reinforced by a recon lance of 4 light mechs, though only 3 of the original lance appear to be active following the Steel legion RECON. An additional Capellan recon lance conducts a regular patrol sweep and a regular pattern has been identified.

Scans of the base show that their turret complement is only operating at 50% capacity.

*Game information*

The attacking lance gains a +2 initiative modifier due to prior intelligence regarding terrain, enemy forces and defenses.

The attacking lance may choose to attack at night to apply a +2 difficulty modifier to all gunnery checks. If all mission are achieved under this condition, a 50WP bonus will be added.

Due to timing their attack during the defenders patrol schedule, the attacker has the option of the defending recon lance being placed in reserve and arriving on turn 4 or turn 8, at the attackers discretion.

The attacker may choose their board edge for deployment.

The Steel Legion force chose to time their attack so that the Recon Lance would enter the board on turn 8.
  

Attacking Forces:

Steel Legion
Jenner: Fawlkes "Fox" Lessaariss Gunnery 4 Piloting 3 
Spider: Tiberius "Centurion" Gunnery 4 Piloting 4 
Panther: RJ "Striker" Wolfen Gunnery 4 Piloting 4
Hermes II: Hoida - Gunnery 3 Piloting 6

17th Avalon Hussars:
Enforcer: Alpha One - Gunnery 4 Piloting 5
Enforcer: Alpha Two -Gunnery 4 Piloting 5

The Liao Garrison Lance.

Defenders:

Garrison Lance:
Griffon: Force Commander - Gunnery 3 Piloting 4 (piloted by Dougal)
Jagermech: Regular Pilot- Gunnery 4, Piloting 5 (piloted by Me)
Clint: Regular Pilot- Gunnery 4, Piloting 5 (piloted by Craig)

Infantry: (played by Ken)
2 Company's of Rifle Platoons. Gunnery 4
6 Medium Laser Turrets Gunnery 4
2 Anti-aircraft Turrets Gunnery 4

Recon Lance (Played by Dougal)
Wasp - Gunnery 4 Piloting 5
Stinger- Gunnery 4 Piloting 5
Locust One - Gunnery 4 Piloting 5
Locust Two - Gunnery 4 Piloting 5

http://www.sarna.net/wiki/images/3/39/Sword_%26_Dagger_-_Stein%27s_Folly_3025_Liao_Invasion.jpg

MISSION LOG:

The Steel Legion forces split themselves for a two pronged attack from the east. While the two Enforcers from the 17th Avalon Hussars mounted an oblique attack on the compounds main gates, the Spider and the Jenner made a flank attack straight over the walls. However, while the Spider had sufficient jump-range to leap into the base confines from some 200 metres away, the Jenner had to advance far closer to the walls before jumping, leading it to take some considerable damage to the legs from vibro-mines. Determined to close sufficiently to jump into the base, Fox continued to advance despite the damage to his Mech's vulnerable legs, only to set off a second vibromine.

Meanwhile, alerted to this new threat by the explosions, the pilots of the Garrison Lance shook themselves awake in their cock-pits and powered up their Mechs from-standby mode. Nearby defence turrets and infantry engaged the Spider and the damaged Jenner, but the Steel Legion mechs were quickly able to destroy the nearby turrets, while several infantry platoons focused fire on the swift-moving Spider. Meanwhile the remaining Steel legion forces concentrated on destroying the laser turrets near the gate with the exception of Hoida's Hermes II, which concentrated on scanning for mines.
Centurions Spider is already deep inside the base while Fox stumbles into the mine-field.

 The Garrison Lance reacts quickly. The Clint moving to intercept the Spider while the Griffon bravely advances to hold the gates. Meanwhile, the Jaegermech stomps into an excellent firing position behind a triangular office building, giving itself cover from attacking Mechs while protecting it's vulnerable rear armour with the lighter, V-shaped officer building behind. The Spider moves back to support the Jenner, which leaps into the base perimeter and has the misfortune to land almost on top of a hidden infantry platoon. Meanwhile, while the Panther and Hermes remains outside the base to concentrate fire on the Griffon, the two Enforcers flank the Griffon by jumping over the walls, again landing almost on top of concealed infantry units.

The shoot-out in the Base.
The two forces blast away at each other, each inflicting minor damage on the others, until eventually the Griffon is felled by sheer firepower. In a last, desperate act, the Griffon moves towards an Enforcer standing on the defensive walls, firing as it does so. However, the brave pilot is destroyed with his Mech before he can push the invading Enforcer off the high walls and onto the minefield below.
The Griffon falls.
With the Griffon felled, the Enforcers engage the heavily outgunned Clint, despite taking great torrents of autocannon fire from the Jaegermech. The Jenner attempts to outflank the Jagermech, but leaves itself open to a rear attack from the Clint as well as close range fire from the Jaegermechs lasers when Hoida and his Spider fail to cover the Jenners back [Because the guys had miscounted how many Mech's we had left and hadn't realised they'd have to activate the Jenner and the Spider before we had to activate the Clint. William sensibly moved his Spider into cover rather than risk having the Clint take a shot at his nearly armour-less rear torso locations rather than the Jenners].
Jaegermech, Jenner and Clint in the mid-left of the photograph.
Meanwhile, the remainder of the attacking forces advance further into the base. The Clint soon falls to the combined firepower of the Enforcers, the Panther and the Spider. Meanwhile, Hoida is his Hermes II continues to hang-back, alternately engaging turrets and scanning for mines.

The lightly damaged Jenner, badly mauled by the fire from the two Capellan Mechs and forced to retreat further west at a run, it manages only a few tens of metres however, before skidding on the slick tarmac and crashing into the Mech-firing step that runs on the inside of the walls.

Meanwhile, the Panther moves in closer to the base while the two Enforcers begins stalking forward, trading shots with the Jagermech and the Clint. The Spider manages to outmaneuver the Clint, which takes a veritable fusillade of shots to it's vulnerable rear and goes down in a burning heap. Alone, the brave Jaegermech, so far largely protected from damage by the small, triangular building it shelters behind, fights on. But not for long. While explosions still wrack the destroyed Clint, Liao reinforcements finally arrive.

The Laio Recon Lance arrives on the scene at last.

The arrival of the Laio reinforcements finally prompts the Hermes II to enter the now (relatively safe) confines of the base. The Enforcers and the Spider engage the Jaegermech and the infantry while Fox in his Jenner continues to flee westward, engaging and, in turn, engaged by the remaining handful of turrets on the western side of the base. The Jaegermech continues to dish out more damage that it gets, including several cock-pit hits but, alas, all such hits are with the rather pitiful AC2's rather than the more damaging AC5's or Medium lasers. Meanwhile, the Laio Recon lance moves forward to assist the base.
Hoida's Hermes II finally overcomes it's mine-phobia and enters the base

While the Hermes II set's about roasting the remainder of the Infantry garrison with it's flamer, Fox in his Jenner Jumps up onto the light, V-shaped building behind the Jaegermech. Sensing it's danger, the Jagermech heads a few metres south then triggers it's torso lasers and left arm autocannons not at Fox, but at the building itself. In a squeel of tortured I-beams, the building collapes, taking the Jenner with it. Although Fox somehow managed to keep his battered machine upright, it takes extensive damage from falling concrete and steel. The Enforcers and the Panther are quick to avenge this deed however, a lucky hit finally penetrating the Laio mechs weakened torso armour and triggering an ammo explosion that leaves little behind but the machines legs.

Meanwhile, Centurion's Spider leaps back over the wall (and the miefield) to engage the Laio Wasp and Stinger at close range, however, in the close brawl the Spider takes the worst of it, losing an arm to the enemy. However, moments later, Hoida's Hermes fries yet another infantry platoon. The senior Laio garrison officer surviving decides enough is enough and transmits his surrender while the Laio Recon lance flee into the descending dusk.
A sneaky jump from the Spider backfires when Centurian loses an arm.


Comstar Communiqué 92376lb34-SLCOM-05-10-3025


Distance is an illusion. The word knows no such limits.
-From Collected Short Sayings of Blessed Blake, Edition XXII, ComStar Press, 3015

Start encrypted message

Sterling work, Steel Legion. I commend your persistence in traversing a Capellan minefield to continue with the assault - I've heard of mercs turning tail in the face of lesser dangers. As promised a deposit of a quarter million in c-bills has been transferred to your account. We managed to retrieve a gutted Capellan Cicada from one of the mech hangars. My orders are to requisition what salvage I can but since you took it out single-handed, I think you've earned the salvage. The mech will be couriered to Galatea on your departing jumpship with my compliments. I'm afraid I don't have any further work for you at present, it looks like we'll be kicking Liao's troops off this world very soon. However, I shall be sure to pass a recommendation on to FSAF's high command in case we have future work for you.

Regards

Field Marshal Ran Felsner
17th Avalon Hussars
Steins Folly


Wednesday, 22 August 2012

Review: Vinyl Maps from Signs on the Cheap

First, the disclaimer: SignsontheCheap.com approached me a week or two ago with the offer of creating a free vinyl map or similar gaming related item in return for a placing a review on my blogs. However, there was nothing in the deal that suggested this had to be a positive review.

But it's going to be pretty damn positive anyway. Just take a look at this:


Although I never thought to include anything for scale, what you're looking at here is a 3 high vinyl map of the Empire and Kislev from the Warhammer World. Despite the quite considerable magnification to go from the original image here:


...to the image printed on the vinyl, all the place names, rivers, mountains and other terrain features are clearly discernible and readable, with only minimal blurring. Someone more pedantic than myself might consider tidying up the place names with a permanent marker but there's really no need. The map is entirely readable even in quite dim light and frankly, looks pretty damn amazing too.

You'll notice that the image printed here is slightly truncated north-south when compared to the original image. That's because the guys at Signs on the Cheap noticed that the original file I downloaded from the web-site was corrupt, and had a band of randomly coloured pixels just south of where my map ends (you can see it on the original image if you look closely). They kindly suggested a number of options and we eventually decided simply to end the map just before the corrupt segment.

Delivery was extremely fast and proofs were emailed promptly only a day after I sent the map image. Anyone considering such a campaign map should certainly give signsonthecheap.com a good look.

I'm even considering trying to commission a proper vinyl battle-mat or two just to see how they turn out. I have a lot of old Classic Battletech hex-maps that I'd particularly like to see reproduced on a material considerably more durable than paper or cardboard. Watch this space and I'll let you know how I get on.


Friday, 17 August 2012

Fox Hounds Escort Mission Report

Contract Registry: FS-OC-08-08 - CONTRACT COMPLETE
Unit Assigned: FOX HOUNDS
Working for the: Federated Suns
In the: Federated Suns
To complete the following: Escort
System: Great Gorge
Forces Recommended: 1 Lance
Contract Duration: 1 Month (15 Days in REAL TIME)
Employer Contact: Losart Ulitock, Marquis of Great Gorge
Jump/Drop Fees: 50 WP
Pay Rate: 100 WP
Support: None
Salvage Rights: Low
Command: Independent

You are requested to provide escort for a shipment of medical supplies being transported from New Stockden to Gorge View. Pirate activity from the Tortuga Dominions has been hitting shipments. Ensure the shipment reaches Gorge view unharmed. A 5 WP bounty will be paid for each destroyed pirate mech.

Planetary System Data:

Star Type A3V
Position in System 5
Time to Jump Point 21 Days
Recharging Station None
HPG Facility Class B
Percent, Level of Native Life 40%, Primitive Plants
Planetary Capital New Stockdon
Image


Fox Hounds Personnel:

Scarlett ( Gunnery 4, Piloting 5)  Javelin
Ranger (Gunnery 4, Piloting 4)   Commando
Domino (Gunnery 4, Piloting 6) Assassin
Vike (Gunnery 4, Piloting 5)      Valkyrie

Mission Report:

Deployed in line abreast for maximum sensor coverage of the main island, the Foxhounds cautiously approached the Panacea Medical facility where they were contacted by local guide Angel-One, a militia hovercraft.

After scanning the surrounding area, discovering to their dismay that the route passed over a number of long road- bridges linking a chain of several small islands, the Foxhounds formed up. Lishka and Ranger, with their short range weaponry, took up position at the head of the convoy and travelling approx 100m ahead of the five civilian craft they were contracted to escort. Domino and Vike, with their longer ranged weapon systems, took up position at the rear of the convoy to scan for approaching threats. 

Soon after successfully identifying a suspicious mag-scan return as a deposit of metal ore, the Foxhounds intercepted a transmission from Angel One:

...."lambs to the slaughter, they're all yours boys."

While the initial reaction was to blow Angel One out of the water, Scarlett instead argued that so long as Angel One believed it's treachery undiscovered, the hovercraft would not join in any fighting. She predicted that the hovercraft would soon develop a convenient malfunction that would leave it combat ineffective. Inevitably, this happened as soon as the first Pirate Mechs were detected.

Scarlett and Vike took up over watch positions while Ranger and Domino continued to scan for contacts. It was as well they did, for while three contacts appeared on scopes some three hundred metres out -two Locusts, and a Fire Starter- Ranger also detected three more contacts in the water a scant thirty metres to his North.  Reasoning that the Pirates -the Vultures, by their unit markings- anticipated that the  Foxhounds would charge the three Mechs in front (and thereby place themselves in a vice) instead held their ground, salvoing missile strikes into the Locusts in a bid to cripple them early. Not until the three concealed mechs in the water - a Falcon, a Wasp and a Stinger- completed their start up did the lead Fox Hounds back up into cover.

By this time, the convoy had already been ordered to retreat to a small ruin some three hundred metres behind the lead Foxhounds but still within Domino and Vike's scanner range and Line of Sight. While Scarlett and Ranger continued to savage the Locusts at close range -forcing one to retreat and attempt a flanking manoeuvre through the shallow seas, Vike and Domino provided long range fire support. With at least three Foxhounds concentrating fire on a single Pirate Mech at a time, the Pirates swiftly lost a Locust (to Vike)  and then a Stinger (to Domino) in quick succession. Ranger's Commando sustained heavy damage in the exchanges but with two Mechs down and two more in danger of being crippled, the Pirates retreated. Pursued by the Fox Hounds, the second Locust was brought down in a hail of fire from Scarlett and Ranger, though Ranger struck the final blow and claimed the kill.

All three pirates were captured after ejecting from their Mechs. All three (including the infamous Stinger pilot, Johnny Redbase) were arrested by the local militia. They were soon joined by the treacherous crew of Angel One. As well as receiving full-pay for a successful mission, the Fox Hounds were pleased to receive a 50,000 C-Bill bonus for each pilot (5WP). They were also presented with some salvaged ammunition and a salvaged medium laser from the Battlefield. Aside from the Commando, the Foxhound Mechs suffered only light damage in the engagement.

Reward: 120 WP

Total WP: 170 (50 remaining after jump fee's plus 100 for mission plus 20 for bounties).


Wednesday, 8 August 2012

Battletech: Steel Legion Mission Report


Image


By Doug the DM:

 Fun game of Battletech last night. The Steel Legion players took on their first live mission on behalf of the Avalon Hussars, a recon of a Capellan supply depot outside the besieged city of Travis on the world of Steins Folly. The planet is under Federated Suns control but is under a heavy assault by the Capellan Confederation.

The mission started quietly with the mercs approaching the depot with sensors in passive mode to try and avoid early detection by the Capellans. Soon however, they spotted the heavy concrete walls of the depot, bristling with automated laser turrets. Turning their sensors to active mode, they began to scan for enemy activity and immediately detected an approaching patrol - a Cicada and two Skulker wheeled tanks. The Cicada pilot opened a comm channel and challenged the mercs, demanding their surrender. Ronin immediately moved to engage and scan the enemy patrol in his Hermes 2 whilst Striker, Fox and Centurion closed on the base, shooting down turrets. The mercs detected the cold starts of 2 battlemechs inside the depot and Centurion jumped his Spider across the walls to scan the enemy mechs before they became fully active.

Inside the base, infantry poured out of a barracks and a Clint and a Jaegermech came lumbering out of a mech hangar, but the agile Spider darted between the hangars and evaded them, continuing to scan for valuable tactical data. Fox and Ronin dueled with the enemy patrol as Striker continued to destroy turrets, leaving the north wall of the base bereft of any defenses. Centurion detected another cold start in the other mech hangar - the Capellan commander piloting a Griffin!

Making a final scan, the Spider leapt the walls and began to make a dash for the dustoff site. Striker began retreating at a slower pace, his Panther unable to keep up with the fast-moving spider. He traded shots with the enemy battlemechs that appeared on the fortified walls of the depot, chunks of armour raining from his mech. The Griffin stormed out of the front gates and pursued Striker, blazing away with PPC bolts and volleys of missiles. Fox and Ronin continued to duel the Cicada until a clumsy kick brought the Capellan mech down and Fox's Jenner blasted a hole clean through the centre of its chassis. Fearing for his life, the Cicada pilot ejected, allowing Fox and Ronin to head for the dustoff zone without pursuit.

Striker made his way slowly through the foothills, dodging the Skulker wheeled tanks and the vengeful Griffin. More armour was stripped from his mech, but he eventually made it to the drop ship Makoto, albeit with a frozen hip actuator and cracked barrel on his mechs main weapon. The mission was a success and the Steel Legion were airlifted back to Davion lines, having obtained the recon data and given the St Ives Lancers a bloody nose.

Wednesday, 1 August 2012

40K Kult of Speed vs Imperial Guard Gun Line

Played my second game of 6th ed 40K last night against Charles and his Kult of Speed. Although there are no photographs (lighting conditions in the hall are terrible for photographing battle-reports, mostly due to a very high ceiling) Charles took the time to write up a quick battle report earlier today.

And here it is:

Charles' Battle Report:

With the arrival of 6th edition, a certain element of the spring clean is in the air, as players renovate their forces. Myself and my opponent for this game were no exception, as I decided to change my foot horde Orks to a mechanised Kult of Speed, while Brian took his guardsmen out of their Chimaeras and sent them out to fight and die via shank’s mare. Thus we were both trying out a new playing style, and it was interesting to see how they interacted.

The board was a cityfighting one, very beautiful at that, with my right flank anchored by the sea. We fought The Emperor’s Will on a Dawn of War deployment. I got to choose the deployment zones, and selected the one with the highest ruin (so as to deny it to the enemy guns), while each of us chose to put our objective inside a ruin of some kind.

The forces were as follows:

Imperial Guard

HQ
Command Squad (50). Two Flamers (10), Regimental Standard (15), Heavy Flamer (20), Master of Ord (30) Total: 125 points.

Troops:
Platoon HQ (30) plus four Grenade launchers (20)
Squad (50) with Grenade Launcher(5) and Heavy Bolter(15)
Squad (50) with Grenade Launcher (5) and Autocannon (15)
Total: 190pts.

Veteran Squad (70) with 3 Plasma Guns (45) Total: 115pts

Veteran Squad (70) with 3 Melta Guns (30) Total: 100pts

Veteran Squad (70) with 3 Melta Guns (30) Total: 100pts

Heavy Support:
Leman Russ Battle Tank (150) plus Lascannon (15) and Heavy Bolters (20) Total: 185

Demolisher (165) with Lascannon (15) Total: 180

Total Cost: 996pts

Orks

HQ:
Big Mek, Kustom Force Field, Cybork Body - 95

Troops:
Gretchin – 10, with a runtherder – 40
Skumsnik’s Boyz – 12, with a Trukk (Reinforced Ram, Red Paint Job) and a nob (Bosspole, ‘Eavy Armour, Powerklaw) – 167
Shakgor’s Boyz – 12, with a Trukk (Reinforced Ram, Red Paint Job) and a nob (Bosspole, ‘Eavy Armour, Powerklaw) - 167
Grotgul’s Boyz – 19, with a nob (Bosspole, ‘Eavy Armour, Powerklaw) – 164

Fast Attack
Warbikers – 3, with a nob (Bosspole, Powerklaw) – 115
Dakkajet – Extra Supa-shooters, Flying Ace – 130

Heavy Support
Battlewagon – kannon, two big shootas, reinforced ram, red paint job, armour plates – 120

Missions, Set-Up and Deployment:

Brian won the roll for deploying, and decided to go first (funny, that). He refused his right flank, and castled up in three ruins, with his company command squad sitting on the left flank, which was anchored by the sea, and his right by a Platoon Command Squad and the Leman Russ. He had good sightlines forward. I deployed the three vehicles and bikes facing directly at his Leman Russ Demolisher, with one of the trukks hidden behind the pillars of a building. The bikes hid behind a trukk. The whole army was in the KFF bubble, except for the Gretchin who were sitting in a ruin with walls so high that they couldn’t actually be seen by the guardsmen.


First Turn:

The first turn started with all of the Imperial Guard squads moving and running forward, so that they were in front of the tanks, command squads and heavy weapons. The shooting phase seemed to last an age for my poor Orks, but some lucky rolls on my part for the KFF ensured that the vehicles were all capable of movement, albeit with 2 hull points lost on the left-most trukk.
I surged forward, in the world’s shortest movement phase: the left trukk raced over a crater towards the platoon command squad. The battlewagon and bikes gunned forward, and the right trukk sat between the two of them. In the shooting phase I opened up with the bikes onto one of his squads in the open, but Brian passed all of his saves. The battlewagon and shoota boyz inside unleashed a fusillade, killing some guardsmen from a squad directly in front of them, but it wasn’t much. Meanwhile, both trukks went flat out, so that the left trukk was lurking behind a ruin in front of his platoon command squad, and the right trukk had weaved through the bikes and wagon to end up in front (being the eager scamps that they are).


Second Turn:

The second guard turn started with almost no movement beyond some shuffling on my left, to bring some meltaguns closer to the left trukk. The guard squads all tried their absolute best to destroy the trukks so that the big guns could obliterate them, but Brian’s luck (and the KFF) conspired to ensure that this was but a dream. In the end, he managed to blow up the right trukk with his demolisher, killing one of the boyz inside in the process. I was just about to triumphantly start my turn when he remembered that he had a Master of Ordinance, who duly proceeded to simply erase nine of the poor Snumsnik’s ladz from existence. The survivors (all two of them) managed to pass the relevant saves.

The Ork turn two started with a failure to bring on the Dakkajet, directly due to Brian’s warlord having the strategic trait that made my reserve rolls harder. Shakgor’s boyz on the left flank leapt out of the trukk, eyeing the platoon command squad. The bikers moved towards the Imperial Guard squad in front of the platoon command squad. The two ladz from the destroyed trukk hoofed it over a crater to threaten a veteran squad in front of them, while Grotgul’s ladz and the big mek disembarked from the battlewagon to attempt a multi-charge on a veteran squad and the guard squad with the autocannon.

In my shooting phase, I had to be careful not to kill things that I wanted to charge, but it still went quite well. The bikes took revenge for the trukk by mowing down the guard squad in front of them with gay abandon, with the left trukk adding in its firepower, leaving the squad all dead. The battlewagon fired all it had at the company command squad, killing one member (the heavy flamer). Shakgor and Grotgul refrained from firing, but Skumsnik managed to kill one guardsman in this phase. In the assault phase, Grotgul’s ladz failed to impact both squads, losing two of their number in the process, but still wiped out the veteran squad that they did impact. Shakgor’s ladz on the left flank managed to eradicate the platoon command squad, consolidating into the ruin, while Skumsnik and his lad (singular) charged the squad in front of them. He snipped the sergeant apart in the challenge, but I lost the boy to his guardsmen, leaving only him to face down seven of them.


Third Turn:

Brian’s third turn saw his tanks revving their engines to move 6” away from the nearest boy squads, and his command squad move forward to use its flamers. The shooting phase saw half of Grotgul’s ladz gunned down by the autocannon, the heavy bolter, the flamers and the demolisher cannon, even as the leman russ in the middle of his lines failed to kill the yellow boyz. Once again, as I was about to celebrate a successfully survived shooting phase, Brian remembered his master of ordinance, who duly proceeded to render unto death eight of the nine ladz in Shakgor’s mob, the nob himself included; the survivor fled (understandably). In melee, Skumsnik got himself killed.
At the start of my turn, I successfully brought on the Dakkajet, much to my relief. Brian still had both tanks and the Master of Ordinance, who was butchering me, while I was down to one effective mob, the bikers, and two empty transport vehicles. The Dakkajet aimed squarely at the Company Command Squad, while the warbikers throttled past the leman russ and Grotgul’s boyz pounded forward towards the squad with the autocannon (who were holding the objective).

In the shooting phase, Grotgul’s ladz killed half of the autocannon squad, while the trukk and battlewagon fired at a veteran squad beside the heavy bolter squad and killed all but two. The Dakkajet gunned down the company command squad, to jubilation from all the surviving ladz.

In assault, Grotgul’s mob charged and finished off the autocannon squad, thus holding Brian’s objective, while the warbikers destroyed the leman russ. However, horror of horrors, the explosion managed to put two wounds on the squad, which killed the nob (the only model in that squad who could harm the demolisher).


Fourth Turn:

At the start of Brian’s fourth turn, I was fairly confident of victory, but he consolidated his remaining firepower to pound Grotgul’s squad, killing every one of them except the nob and two buddies; the big mek fell in the fusillade. This left me with only two ablative wounds on the only model left able to kill the demolisher, and no real hope of claiming his objective properly.

I had to send the Dakkajet away on my turn, as I’d placed it poorly and it now couldn’t see anything. I sent Grotgul at the demolisher in a desperate attempt to kill it, while the trukk and warbikers eyed up the heavy bolter squad. Firepower from the battlewagon, trukk and warbikers pounded this squad, but they held with most of their number intact. In assault, I charged the warbikers into that squad, but poor luck on my part saw both bikers dispatched by overwatch and melee attacks before they could do anything. Grotgul had better luck however, managing to destroy the demolisher without blowing his squad to smithereens.


Fifth Turn:

The fifth turn didn’t see much movement in the guard ranks, as Brian sought to kill off my remaining troops on his side of the board. This he did handily, but he had not managed to do anything to my circling vehicles.
I began the festivities of my turn by bringing the Dakkajet back on from Ongoing Reserves, and aimed it towards the guard squads. The battlewagon tank shocked the two remaining squads (two veterans and the heavy bolter squad), forcing them both out into the open. In the shooting phase, I then managed to kill one of the veterans and leave the guard squad pinned and down to two men. It felt nice to be the one dominating shooting, for a change, even if night fighting had now fallen.

We rolled for an extra turn, and got it.

Sixth Turn:

The sixth turn was short: Brian moved the veteran onto the objective, and I promptly killed all three of his guys to win by tabling.


Charles' Conclusion:

The game was very close, with the guard firepower pounding the utter crap out of my Orks and leaving me with too few guys to kill his units. I worked out afterwards that I had 47 infantry models to Brian’s 60, which wasn’t a very good ratio for me. In hindsight, I was lucky not to have lost my trukks on turn one, and also lucky that he didn’t get to ordinance more than one squad out in the open. Kult of Speed is a new playstyle for me, and it is quite terrifying to have so few models; I am inclined to wonder if the warbikers, battlewagon and dakkajet are just too many toys at this points level. Brian’s army performed quite well, putting a formidable amount of firepower out, and even killing Orks in melee. Overall a very enjoyable game, and damned close too.

Brian's Conclusion:

It really was nail-bitingly tense right to the bitter end. My Master of Ordnance was worth his weight in gold. For only 30 points, he more or less wiped out two boyz mobs on his very own. If he hadn't been on the ball (hitting every time) the story would have been much different. Considering that the MoD has a 3D6 scatter on a miss and how close the boyz were too my own lines at this point, I could have been wiping out my own squads.

When I killed the last of his boyz in turn 5, I thought I'd be able to force a draw. I'd neglected to target the 40pt gretchin squad holding his objective throughout the game because I always had something better to shoot it to preserve my own forces. My plan had been to kill the trukks by turn 2 and pound the hell out of the grotz with blast weapons from turn 3 onward and to deny my own objective to the Orks. Either by killing all the Boyz or keeping hold of it myself. The fact I wasn't able to kill all those vehicles in the first two turns (as I'd expected) put paid to that idea. I hate  Kustom Forcefields.

That Big Mek was definitely Charles' ork of the fight.

Things I need to consider:

  • Don't forget to use the Master of Ord in turn 1 when all those juicy vehicle targets are parked close together.
  • Don't use the MoD so close to my own lines. I was lucky. Very lucky.
  • I need something to threaten fliers more effectively. I can't rely on Warlord abilities and being jammy enough to set up an autocannon on a mysterious objective that turns out to be a Skyfire control centre. 
  • Bring it' Down would have been a more effective order than First Rank, Second Rank, in turn two. I'd counted on my Plasma Guns, Melta Guns, Krak Grenades, Tanks and Platoon HQ to pop at least two trukks that turn, and wanted to make sure my remaining guard squads could put down enough fire to reduce the transported boyz inside to ten figures or less to force a rout test. I should have gone for Bring it Down instead and worried about chopping up the boyz later. 
  • My Company Squad with the two flamers and the heavy flamer was deployed too far back at the beginning of the game. I'd reckoned on using them to wipe out ork squads that cut through my front line. They might have done better being in my first line (rather than my second line) from the start. As it was, they fired their flamers just once all game.
  •  Use the last four points to buy bolt pistols for my Company Commander and Platoon Commander. Las pistols really, really suck.