Showing posts with label In the Emperor's Name. Show all posts

Tuesday, 20 March 2012

ItEN Campaign: Month 1 Update and Mini-Battle Reports

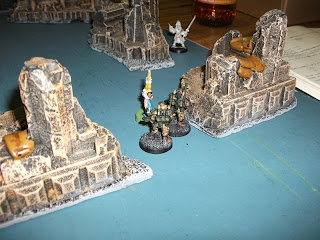
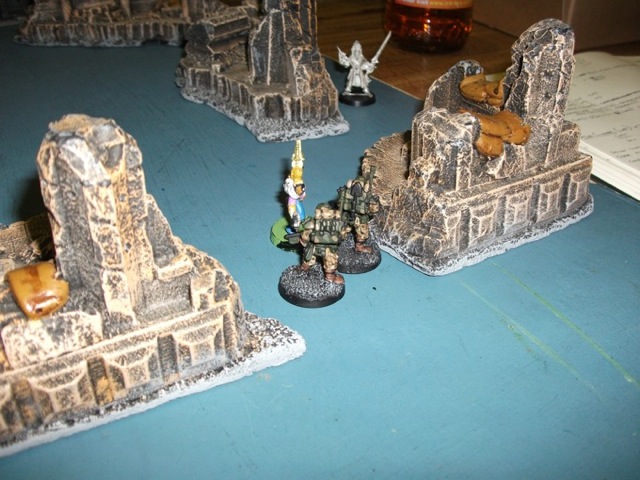
So far, four warbands have met in the clash to locate and seize the Malegaunt Standard Template Construction Device. The photo's aren't great: the lighting in our whole isn't the greatest but the lads did what they could with mobile phones and the like.

Battle 1:
Amidst the ruins of the Adeptus Arbites Precinct, the Death Guard  of Papa Nurgle met and engaged the Ork's of Craigs's as yet unnamed Ork warband. Though the mighty war boss managed to find and recover a data-slate listing the Arbites Guard Rota, the cost was grim and terrible. Caught up in their unholy battle-glee, the Death Guard marines completely disregarded their mission in favour of inflicting calamitous casualties on the Ork warband, made all the more vulnerable by the absence of any Squigs or gretchin meat-shields on the battlefield. In the end, the green-skins managed to escape with their valuable data via a handy broken window, yet seven of their number bled their last on the gore-soaked rubble. Papa Nurgle and his small band sustained no casualties.

(I'm still waiting on photographs of this scrap being emailed to me. There aren't many. In the heat of the battle, about six turns went by before anyone remembered to take any).

Battle 2:
The second battle of the Malegaunt STC was a bloody green-on-green affair.  The Orks of Graeme and Nick met in a raging battle in the Adeptus Mechanicus district. Atop a mighty Ziggerut in the main Biologos facility, Graeme's warboss held the pinnacle long enough to download the senior Magos Biologis' research data, though Ork's were blown apart around him by a rain of grot-thrown stikk-bombz. The climax of the battle came when his Rival Boss met him choppa-to-choppa atop the steps, but Graeme's powerful Boss threw down his enemy. Now there is talk of the two warbands combining their might. Is this the beginnings on a new Waaargh? Will Graeme's war boss succeed in recruiting Boss Craig to his side also? Or is all this talk of an Ork alliance merely scurrilous rumour? Who knows, but who better to teach them pansie oomies and pointies a few new tricks than the might of three Ork warbands?
Graeme's Boss and Mek Boy weather the grenade storm to seize the Ziggerut.
With just two turns remaining till the data is downloaded, Nick's Boss makes his challenge in the formal manner: "Ere grot-bags, yer maw wuz a space marine!"
Graeme's Ork of the match: the gunner who took down most of Nick's Boyz.
After-Battle

As previously mentioned, Craig lost seven of his Orks who failed their after-battle Grit rolls to recover from wounds. The second battle saw equal carnage, yet through some extremely jammy rolling most of the casualties made their grit rolls, for a total of just three deaths despite fierce fighting.

Both Craig and Graeme's retinues managed to pass their investigation rolls (surprisingly, especially when you consider that neither have a single model with the Investigator skill). Following the clues will lead them both to new objective locations to be decided when the remaining battle results are in.


Saturday, 10 March 2012

In the Emperor's Name Campaign Update


We've had a few delays, but finally we're about to begin our Wh40K In the Emperor's Name campaign. We have a good selection of forces, with the Imperium so far being somewhat under-represented in comparison to the Xenos and Traitor retinues. Given that there were be limited opportunities to receive reinforcements during the campaign, it's perhaps not surprising that most of the players have chosen forces with good grit values. It remains to be seen whether this will be a wise choice. After all, with such expensive figures, one or two casualties failing to recover from wounds after a game can be crippling.

We have ten confirmed players and 1 referee (me). Most of the retinue lists are in but one player signed up late and has still to finalise his.

So far we have:

Imperial Retinues:
Ordo Xenos Warband
Space Wolf Warband

Chaos:
Chaos Cultist Warband
Night Lord Warband
Death Guard Warband

Xenos:
3x Ork Warbands
1x Harlequin Warband
1x Eldar Pirates Warband.

The first campaign month runs between this coming Tuesday and the second Tuesday in April. I'll be listing the match-ups for the first month's compulsory games on Sunday, once I've received the final warband roster.

Edit: The final warband is in. Another Ork mob leaving us with three orc players.


Wednesday, 1 February 2012

Throne Agents

Some more stats and painted figures for the Throne Agents in my "In the Emperor's Name" solo campaign. All of these painted miniatures were recently featured on my Lead Legion blog.

We have:

 Stitch (Ganger): 
A local under-hive ganger, Stitch saw her entire gang wiped out by a secretive new power in the under hive. Not a starting member of the Inquisitor Hellstrom's retinue, she is the "objective" in the first scenario of the campaign and will begin play as a player controlled character. If she survives, she'll join the retinue.
ItEN Stats: 
Grit 4+, FV +2, Sv +2, Spd +2
Armour: 6+ (Synthskin/Gang Leathers)
Skills: Nose for Trouble, Medic Special: Escher Ganger (+2 SPD),
Gear: Combat Knife, Autopistol. Cost: 0 (initially), After Scenario 1: 31 points.
Skills: Nose for Trouble, Medic,  

Logan (Interrogator):
An ageing veteran, Logan tried (and failed) to achieve Inquisitor status several times before accepting his natural place as a Senior Interrogator. Formerly the Chief of Staff to Inquisitor Krungveld, he now acts as de facto second in command to Krungveld's young protegee, the newly-rosetted Inquisitor Hellstrom.
ItEN stats:
Grit 3+, FV +2, SV +2, Spd +1
Armour: Carapace (7+) Skills: None Special: May act as a Leader figure if Inquisitor Hellstrom is not taking part in the scenario. Gear: Lasgun, Autopistol, Sword. Cost: 29 points


 Aneshia Kynes (Astropath):
Although an extremely powerful telepath (powerful enough to earn a place on the staff of an Inquisitor of the Holy Ordos) Aneshia Kynes is a rare case: an Astropath who is utterly blind. While others who have undergone the Soul Binding ritual are able to perceive their surroundings through the warp, not so with Aneshia.
As such, she requires a guide in order to move during the course of a scenario.
 ItEN Stats:
Grit 5+, FV 0, SV 0, SPD -3, Special: Blind, Armour: Refraktor Shield (7+) Psyker Powers: Zone of Shadows, Path of Shadows, Dominatus. Gear: None. Cost: 44 points

Zork (Ogryn):
An extremely intelligent representative of his species (which, admittedly, is not saying much) Zork is deeply devout and carries a number of protective talismans which he believes keep him safe in battle.
So devout is his belief in the protective power of the Emperor, that he can shrug off wounds that would normally slay even another Ogryn.
ItEN Stats:
Grit 2+, FV +4, SV +2, Spd +0
Armour: "Ork Hide" 6+, Skills: Terrifying, Hard to Kill.  Gear: Heavy Bolter, Big Choppa, Combat Knife, Cost: 51 points.


Officer Xia (Arbitor)
Xia is the local planetary Enforcer who first reported the strange goings on that prompted Inquisitor Krungveld's Investigation. Xia was wounded in the ambush that cost  the Inquisitor his life and discharged from service. His services have been acquired by the young Inquisitor Hellstrom, who intends to make good use of his local knowledge of the Hive.
ItEN Stats:
Grit 4+, FV 2+, SV +2, Spd +0
Armour: Carapace 7+ Skills: Medic Gear: Autopistol, Shotgun, Shock Maul. Cost: 26 points.

Friday, 20 January 2012

In the Emperor's Name Solo Campaign:

Right, since we're up to ten players now the for the clubs campaign, I'm going to be way too busy GMing to many games in of my own. For that reason (and because I really enjoy Vampifan's solo All Things Zombie (ATZ) game reports [link] I'm going to start playing a solo campaign of my own. The plan is to play through eleven scenarios (one per month, starting from February) with a final "End Game" scenario in January 2013. Of course, this assumes no untoward delays or failures to accrue Victory Points on the way.

So what's the plan?

Victory Conditions:
Earn 33 Victory Point (surely even I can beat myself) and then win the Endgame scenario. If my Inquisitor and all his Interrogators die, then I lose the campaign.

Special Rule: 
I want this campaign to last a while, so I can never accrue more Victory points than the number of games played x3. All excess Victory Points must be spent on recruitment or traded in for Fate Points at the rate of 1 Fate Point for every 5 Victory Points traded in.

Leaders: For the purposes of this campaign, the Inquisitor himself and all Interrogator models will count as Leader figures.

My Forces: 
I'll be building a 500 points Inquisition retinue lead by a single Inquisitor and his primary kill-team. Normally, I'd have to chose all my mini's from just one of the three Ordo lists, but as this is a solo campaign I'll be cherry-picking my forces from ALL the pro-Imperial army lists in the game but without having to pay the normal 5pts to include a "Strange Ally" in my retinue. After all, it's not as though I'll have an opponent to complain, is it?

I'm still working on the actual list, but as I'm mostly abandoning purchasing 28mm models I want my force to consist of as many existing "naked" model in my collection as possible. I'd rather not buy any more fresh lead if I can help it. But I want to include:
  • An Inquisitor
  • A Navis Noblis Navigator (already covered)
  • An Astropath (already on the painting table)
  • A Squat Engineer (the Gorton model from Warmachine is spot-on)
  • An Ogryn (got one ready to paint)
  • A Vindicare Assassin
  • A Sage
  • A Primaris Psyker
  • And as many assorted Scum, Arbiters, Gun-Bunnies and other Imperial Agent types as I can manage. I plan on holding off on the obvious stuff such as Imperial Guard and Stormtroopers. The campaign rules have options for acquiring local reinforcements in various ways, so these can be added to the force as and where appropriate.
Enemy Forces:
An In the Emperor's Name campaign requires that the player select or randomly determine three enemy factions to encounter during the course of the campaign. One of these counts as the main enemy faction. The other two are alternates that crop up only occasionally.
I'm going to say that the main obstacle to the kill teams investigations are the various Hive Gang's that controls the area of the Underhive in which the Inquisitor is conducting his investigation. These won't be the campaigns main bad-guys, but they'll be the ones that the Retinue find themselves confronting most often. The second faction will be a military style force. I haven't quite decided yet if these will be actual mercs or the remnants of a rogue PDF unit, perhaps survivors of an unsuccessful planetary uprising. I think I much prefer the latter idea though. Maybe their leader could even be the deposed planetary governor? The third alternate faction will be a group of Adeptus Mechanicus adepts, or rather, Hereteks, hiding out in the Underhive where they can pursue their depraved experiments in peace.
I won't reveal just yet who the main campaign bad-guys will be, but there's no guarantee they'll be from one of these factions. Don't go holding your breath for a Chaos Plot though. Not every evil that happens Imperial space has the force of Chaos behind it after all.

What Next?
Well, I have a bunch of painting to do before the campaign even begins. My first game will undoubtedly be against the Hive Scum, as I have plenty of these guys already painted and good to go. The kill-team that takes them will depend on what I have painted between then and now. I can't see me using the full 500pt retinue in this one game however, so that gives me plenty of time to get the half dozen miniatures or so that I'll need for the project painted up and ready to go.

Wednesday, 18 January 2012

Battle Report: 28mm In the Emperor's Name Pt II

Where we left off.
My luck -or rather, George's luck- was about to change drastically. You see that naked lead figure just visible in the top of the picture? That's the Harlequin Troupe Leader. You'll see a lot of him in the next few photo's.


TURN 6
In turn 6 George won Initiative again. His Troupe Leader charged the two Imperials standing above the butchered form of his protegee, all the while screaming through his Troupe Leader Mask. The two Imps both failed the Grit test needed to stand and fight a charging model that causes Terror and legged it in opposite directions, which unfortunately counted as their move for the next turn. This meant that if the Troupe Leader ran in the shooting phase (no charging in this game, melee starts when you move base-to-base) he'd have his pick of the two Imps to mow down. I rapidly moved reinforcements to firing positions on the right flank, desperately trying to judge it so that we didn't get close enough for the Troop Leader to charge the firing line after mauling his chosen prey in the close combat round.

Ere, Jonesy. Lead em over this way a bit, eh?
In the regular rules, any figure which is not within line of sight of an enemy model and which does not shoot can run an additional 3 inches in the shooting phase. We don't like this rule in the club. In fact, we think it stinks. So we use the house rule that any figure who does not shoot in the shooting phase can run 1d6 inches. However, the player must point to where he wants the figure to run BEFORE rolling the dice and you MUST move the full distance in that direction up to the point you indicated. This means that you might roll higher than you need and waste the extra distance. However, if you  roll low, you just might find yourself caught in the middle of the board between the cover you were in and the cover you were tyring to get too. In this game, that pretty much means you're dead, regardless of your armour value, as every foe within range zooms in on you. I reckon it pretty accurately reflects a guy trying to run from cover to cover but getting spotted and mown down half-way there.

Anyway, that's what happened to the final Harlequin Trooper in turn 7. Caught between fallen pillars, Headshot zeroed in and took him out at long range. Normally at this point, depending on the scenario, reducing a retinue to half strength might have won me the game. But as we hadn't picked a scenario and this was George's first game using the system, we'd decided to play till one side was wiped out.

The Harlequin Troupe Leader got his revenge though. By running in his shooting phase he did indeed catch one of my fleeing lads who died very quickly, and very messily, in the Turn 6 melee phase.

Turn 7
George won initiative again and chased down the second terrified trooper who passed his Terror Test this time. I'd really wanted initiative myself to try and move the trooper out the way and prevent the Troupe Leader getting into melee (you can't shoot into a meleeinvolving a figure from your retinue in these rules, no matter how badly the risk of having your whole army rolled up by a melee monster outweighs the risk of fratricide). Finally, because the Sniper had shot and killed a Trooper last turn rather than knocking the Death Jester on his arse (again), the Death Jester was able to move forward. Because he was armed with a heavy weapon, this meant he wouldn't be able to fire this turn, although ominously he was now in range of my main group. If I was unlucky, a good hit from his Shuriken Cannon could terrify my guys into running towards the Troupe Leader next turn. Yikes.

The Troop Leader sizes up another hapless fool.
On my movement I moved the firing line back again, hopefully more than 9" away from the melee, so I could avoid having the firing line engaged in melee by the Troupe Leader next turn.

No shooting from the two surviving Harlequins but my guardsmen split into two groups for Torrent of Fire and managed to hit the Death Jester twice, yet failing to kill him or even knock him down. From his perch, Headshot muttered something disparaging about amateurs and showed them how it was done -knocking the Death Jester down again. For the fifth time in the game! In fact, the Imperial Guard Sniper hadn't missed a shot yet.

In the melee phase the Troupe Leader increased his kill tally to two.

Turn 8:
More woe. The Harlequin's won initiative again. I bit my nails while the tape measure came out. Had I misjudged my distances again? I had! One of my guardsmen was just within 9" of this terrain-ignoring somersaulting harridan. But wait, he'd just charged 7 guardsman, had this pesky Eldar punk finally bitten off more than he could chew? Meanwhile, on the far side of the board, the Death Jester stood up again.

Er, you charge em lads. I'll bravely lead from over 'ere.
I went all in and attempted to move all 7 nearby guardsmen into melee. Yet three of them (including the officer) failed the Grit test to attack a terrifying foe in melee.

One interesting but very important rule: when a pistol armed character moves into melee as the attacker in the movement phase, he still gets to shoot his pistols at his melee opponent in the shooting phase. However, there are a few exceptions to this general rule, such as when you're armed with a heavy pistol like a plasma gun (as was the Troupe Leader). Or when you check your retinue roster and realise you forgot to ferking buy your Guardsmen autopistols. Ah well, at least now I'd figured out why I'd been able to afford two more guardsmen than I usually can.

George laughed so hard he nearly burped. Then he happily split his Troupe Leader's +4 fight score between all four opponents so he could fight every guardsman at once. In the Emperor's name allows you to split your models fight score in order to engage multiple opponents. However, your cumulative bonus' from any weapons held in the models hands still apply to every foe he fights in melee. Thus, the Troupe Leader was rolling D6 +1 (for the split Fight value) +2 (for his plasma pistol) +2 again (for his force sword) against the guardsmen armour value of 6. He needed anything but ones and killed all four Imps. With a -2 to their grit rolls from the plasma pistol, I needed 6's to save and failed every time. However, because melee is simultaneous, I still got to strike back. Miraculously, my bayonet-armed grunts landed two blows on the Troupe Leader. However, with a grit score of 2+, I didn't have much chance of killing him. To rub salt in the wound, George rolled a pair of twos.

Bastard.

Ah well, maybe Turn 9 would swing the tide of battle back in my favour.

Turn 9

Right, which of you Monkies want's to die next?
Nup. George won initiative again. He surprised me by engaging the lone female Guardsman in melee rather than taking on the officer and guardsman in the ruins, who I simply moved into combat next to him. The Death Jester failed the Grit roll to stand up and with no targets available for my Sniper (and with my Officer unable to shoot as he closed for melee due to bolt-pistols being classed as a heavy pistol) we went straight to the fighting.

I didn't even land a blow. Scratch two Guard and an Officer. This lone Eldar mountebank had just murdered 9 of my Guardsmen in four turns!


Turn 10:
Once again I was fervently hoping to win initiative. It would take the Troupe Leader at least two turns to reach my Sniper, but if he moved first he would be able to travel the rest of the way out of my LOS wherever I moved. I desperately needed this roll to win the game.

I rolled a one. "Don't even bother rolling your initiative George. Just move your damn figures". On the upside, the Death Jester did stand up again this turn, so at least I'd have something for my Sniper to shoot.

As expected, the Troupe Leader leapt into cover out of LOS and my Sniper pegged the Death Jester again who  -for the sixth frickin time in the game- made his grit roll exactly and got plonked back down on his arse. Damn that guys gonna have a headache in the morning -and he owes whoever made his armour a few stiff ones (of wine! of wine! -though you really never know with Eldar) when he gets home.

Turn 11:
Piss off mate, I'm trying to kill the guy in the Skull Mask
The frakkin Troupe Leader leaps out from behind a wall and up onto the first floor of the building where-in good old Headshot patiently waits for death. As the blade comes sweeping down, he spits out the chewed stub of his cigar and grunts: "I sure hope the boys back at the hunting lodge never hear about this."

Conclusion: We wus robbed. But I can't really moan too much. The great thing about "In the Emperor's Name" is that no matter how bleak things begin to look, a single dice roll can always turn things round.

My biggest difficulty in this game was overcoming the Harlequin's obscenely high Grit rolls. None of the weapons in my roster carry a Grit modifier, but then, up to now, I've never really needed to carry any that do. Forgetting to buy my lads 2 point autopistols each was an act of sheer mindless stupidity. Something for which I'm well noted in gaming circles. Imp Guardsmen are about as much use in melee as a life-raft made from a blanket but their shoot values are fairly good -especially when combined in a torrent of fire.

Next time, I'll bring a bloody Lascannon. Meanwhile, I'll leave you with an image of a certain grinning, pointy-eared loon gloating over his kills.

Until next time.

Yeah, laugh it up dancer boy. My next retinue has a Lascannon with your name on it.

Battle Report: 28mm In the Emperor's Name Pt I

Last night, in preparation for the upcoming G3 campaign for "In the Emperor's Name" George and I played a game. My Guard versus his Harlequins. Damn. Talk about wargaming history's Greatest Comeback! We played a quick second game afterwords when other members of the Club wanted to join in to try out the rules, so I broke out my Space Marine and Arbiter retinues and put my DM hat on. Alas, with only an hour to go before closing, there was no time to stop for pictures of this second game. So please enjoy the first.

The Glorious Imperial Guard: 426th Arcturus Regiment.

1x Officer (Lt Kole Hellstrom): 
Grit 3+, Fighting Value (FV) +2, Shooting Value (SV) +3, Speed (SPD) +0.
Skills: Leader, Gun Kata (fires twice if knocks down or kills first target)
Gear: Flak Armour (Armour 6), Lasgun, Bolt-Pistol, Dagger, Grenade.
Points: 39

1x Veteran ( Cpl "Headshot" Voltstraad)
Grit 4+, FV +2, SV +3, Spd +0,
Skills: Sniper (ignores armour bonus for cover if remains still)
Gear: Flak (Armour 6), Cameoleoine Cloak (+1 armour bonus from cover), Sniper Rifle, Bayonet, Grenade
Points: 30 pts.

2x Veterans (L/Cpl Horriker and L/Cpl Safferkad)
Grit: 4+. FV +2, SV +3, Spd +0
Skills: Gun Kata (fires twice if knocks down or kills first target)
Gear: Flak (Armour 6), Bayonet, Heavy Stubber.
PV: 48 pts

7x Guardsmen (at the time I couldn't figure out why I could afford 7. Normally I can only field 5 with this list. This will be important later).
Grit: 4+ FV+1 SV+1 Spd +0
Gear: Flak (Armour 6), Lasgun, Dagger
PV: 81 points

Harlequins:
I neglected to grab a copy of George's list but from memory he had:
 1 Troupe Leader with Plasma Pistol and Power Sword
3 Troupers with Shuriken Pistols and Chainswords
1 Death Jester with a horrible screaming death Shuriken Cannon thing.


George would like me to point out that he's had those Harlequin figures since he was just a very little sprog. Which certainly  explains the paint job on some of them, but doesn't explain why the rest still need painting. Eh? Eh? Then again, 20 years is about as long it takes me to paint some of my figures as well.

SETUP:

Set-Up

I won initiative (for very nearly the only time in the game) and forced George to set up first. As I expected, he pretty much ignored his open flank (my left) and only positioned one Trouper there. He set up his Death Jester by the window of a ruined building (soft cover) in the centre of the board with a good commanding view. The remainder of his band also set up in the centre, but would later concentrate on making their way down my right flank.

I positioned my sniper in a good elevated position on the left flank where he essentially had an excellent view of everything on the board except for the extreme right flank, where some taller fallen pillars blocked his LOS. The remainder of my squad deployed in the centre, with two Guardsmen lurking behind a fallen pillar towards the right flank.

Turn One
I won initiative for the second and last time in the entire game ( Initiative is determined by rolling D6 and adding the highest speed value in your retinue to the result. With a highest speed of zero against George's common speed bonus of +2, it was a pretty forgone conclusion that I'd be going second each turn).

All my guys  stayed put, except Sniper Headshot who moved an inch forward so he could peer out the window.

George moved his lone trouper on my left flank forward into cover with frightening speed. The Death Jester stayed put. The other three began a wide flanking manoeuvre down my right flank.
With a speed of +2 giving an 8" movement and their Eldar Flip Belts allowing them to ignore terrain penalties, those Harlequins moved damn fast.

It didn't save them though. In the very first turn of shooting, Head-Shot lived up to his name. Despite needing 9 to hit (Harlequins protective force fields give them an armour 7 of seven plus 2 for hard cover) and not being able to use his Sniper ability (because he'd moved) ol' Headshot hit the mark. The sniper rifle has no Grit Penalties (just an obscene range by the standards of this game) so the Harlequins just needed to roll his Grit value or higher to survive. George rolled a one. First blood (and first kill) to the righteous forces of the Imperium. This initial success was quickly followed up by the female Stub Gunner who knocked down the Troupe Leader with a burst of fire (when a model rolls it's exact Grit value when making a save it is knocked down). Using the Gun Kata skill (which allows her to shoot twice if her first shot knocks down or kills her target) she then fired again at the Death Jester and knocked him down as well. She couldn't shoot the fallen Troupe Leader again because he'd fallen down behind some barrels, meaning she could no longer see him.

Her first shot (against the Troupe Leader) had benefited from the Torrent of Fire rule, wherein any ally within 2" of the shooter who has LOS and range to the target can forgo shooting in order to add +1 to the shooters Shoot Value. The main shooter also contributes an additional +1 to this "Torrent of Fire". It represents miniatures coordinating their fire to "bracket" an enemy. With enough miniatures, even a humble guardsman with a lasgun can overwhelm the armour of a Chaos Terminator. Making the lowly Imperial Guard (with their comparatively large retinue's) a very dangerous shooty army indeed.


There was no close combat, so on to Turn 2.


Turns 2-4:
The next few turns largely consisted of the surviving Harlequin Troupers and Troupe Leader moving down the right flank with my Guard repositioning to meet them with a volley or two on the way. George's Death Jester kept managing to get back up despite the weight of his armour (standing up requires a Grit roll modified by the weight of armour worn) only to be knocked over again by my Sniper. In fact, this Jack-In-The-Box routine would continue for the rest of the game, with the Death Jester getting off only a single shot -in turn 4- and what a shot it was.
The Stub Gunner is vaporised by the Shuirken Cannon.
The Death Jester sends a stream of whirling razor sharp shuriken into the female Stub Gunner, splattering every other Guardsman (including the officer with the blond hair) with gooey bits of stringy intestine and brain matter in the process. Because of this weapons special rules, every one of my guardsmen within 6" had to take a Terror test or run D6" away from the dead guardswoman. Only the officer and one other  passed the Grit roll. The other two scarpered. Lucky for them I didn't fork out for a Commissar! Lucky for me the Terror effect only lasts one round (it counts as their move for next turn) and there's no rules for fleeing models leaving the board.
We're not runnin sir, it's a retrograde advance.
Turn 5
Sorry mate, we don't dance with poncy Eldar.
In turn 4, I'd manoeuvred my two lads out on the right flank away from the oncoming Harlequin Trouper in order to take him out with a torrent of fire. Alas, I misjudged it and the Harlequin, with his insane speed and ability to ignore terrain, charged right in. Oh dear. How unfortunate.

Ooops, let me just help you up - with my bayonet.
For the Harlequin. George's crappy dice rolling continued, costing him his second casualty of the game.
But then, I made the fatal error of letting him use my dice.......
Sunday, 15 January 2012

In the Emperor's Name: Campaign Proposal

Over at G3, my local gaming group, a bunch of us have been looking at starting up a short narrative campaign for "In the Emperor's Name". There's been a lot of humming and hawwing over it, given that the campaign model provided tends to assume that one players warband (normally an Inquisitor's) will take on the central role in the narrative. This model, which I'll be proposing to my fellow gamers, gives everyone a central role. Read on:

The Malegaunt STC:

For six thousand years, the Malegaunt system and it's Standard Template Construction device -one of the few intact STC's left in the known galaxy- has been interdicted from normal space by a colossal warpstorm.

Until now. Three days ago, warpstorm activity in the system abruptly ceased. Orbital scans from a passing Inquisitorial ship reveal hundreds of relatively intact yet deserted settlements below. If home's and buildings have survived the mind-rending effects of the Warp intact, then chances are good that the STC has survived also. Alas, your not the only warband to learn of this opportunity. Dozens of warbands from Imperial and Alien factions alike are converging on the system and it's single inhabitable world.

Who will find the STC first and claim the prize?

Victory Conditions: 
Be the first warband to successfully investigate all five objectives for clues and thereafter capture the STC from it's inhuman defenders.

Premise:
  • Every player begins with one 500point warband. He must complete a roster of all members of his warband and provide it to myself (the DM).
  • Every player will be allocated to one of the five available objectives at the beginning of the campaign.
  • The five objective sites are: The Adeptus Administratum district, the Inquisitorial Forces, the Adeptus Mechanica district, the Librarium of the Planetary Universitat and the Adeptus Arbites Precinct House.
  • Every month, each player will play  one game against all the other players at his clue site. There will be only one battle per clue site per month, so these games will often involve multiple warband's fighting against one another. 
  • The player can fight as many additional battles each month as he wishes. Just bear in mind that any losses incurred in optional games will count. But then, so will any character advancement gained. I imagine the most common reason for such a game will probably be to steal a the location of an objective from another player (I'll devise a scenario for this) or else to rescue a captured member of your warband.
  • The warband (or allied warbands) left in control of the objective at the end of the game may each use the investigation rules to obtain a clue to the location of the STC. A successful investigation will also identify the location of another (randomly determined) objective. The player may move their warband to the new objective and take part in the next battle at that location. If the investigation is unsuccessful, the warband must fight to retain control of the same clue site again next month.
  • The player may select up to 250pts from his warband list for each game.
  • Casualties may be recovered as normal. However, no reinforcements are available to any player unless he can capture an opposing model and convince it to change sides. Yes, this means a warband may be eliminated from the campaign through sheer attrition. 
  • When a casualty result determines that a model survives being removed from play, the model may not be fielded again until after the rest of the warband has participated in it's next monthly objective battle.
  • The first player to obtain all five clues will earn the right to try to claim the STC for himself by playing against a very powerful NPC warband. If he captures the STC, he wins the game. The defending NPC warband will also begin with a set number of points which can be whittled away by multiple attacks on the STC and by guest appearances in other games. The player is allowed to field his entire remaining force in this game and enlist the aid of any allies he wishes in order to secure the STC (assuming the player is willing to share the Glory).
  • Note: this defending force or other native gribblies might make occasional unwelcome appearances in random battles throughout the campaign. In such instances, the DM (that's me) will play the NPC forces where possible.
  • In order to form an alliance, both warbands must be compatible allies in accordance with W40K canon. While a radical Inquisitor might be able to justify allying with Chaos forces,  a Sister's of Battle or Space Marine warband never will.

Wednesday, 28 December 2011

Versatile Mini's: Ground Zero Games

One of the things I love so much about 15mm sci-fi miniatures is there versatility. It's very easy to set aside multiple uses for the same set of figures -and all the more so because so few 15mm miniatures have the instant "brand recognition" of the likes of GW's Space Marines or Privateer Press' Warmachine Line.

The New Israeli's from GZG's are a case in point. Earlier this year I painted a batch of these figures to represent Mass Effect human marines. Now, with a quick re-paint with a nifty white colour scheme I can use them as Imperial Stormtroopers for games of D6 Star Wars Battles. I also intend to use them as Zaman Droptroopers for games of Tomorrow's War. And, in a pinch, considering I intend to add many walkers to the force (in keeping with the Stormtrooper theme), I could even use them as Tau. However, that being said, I have the GZG UN troopers ear-marked for any Tau invasion of Bad Landing.

What's more, by swapping out the aforementioned walker-type vehicles for more traditional tracked or wheeled vehicles, I can even field these miniatures as an especially well-armoured Imperial Guard force. It's amazing (to me at least) how much use a 15mm gamer can squeeze out of one set of figures, helped along simply by a few minor changes in the force structure and some tailoring of vehicle themes for the force.

But I reckon that for a versatile 15mm alien range, you can't go wrong with GZG's Alien Mercenary sets SG15-X05 and SG15-X08. Three blisters will net you 36 of these monsters -which are ideal for painting up as Gears of War Locust, 40K Orks, the Mercenaries from Fifth Element or any other "thug" type alien race you care to mention -even Star Wars Gamorreans! I only have 36 of these guys at the moment, but I intend to net myself another three packs soon to take the force up to 72. I also plan to add in a few vehicles with a random selection of "Orky" refinements made up out of green stuff. That said, I could have just as easily painted my lads grey and purchased a few of the more insect-like miniatures lines out there for Bio-tech support (Khurasan's insect aliens make for excellent grubs) and painted myself a Locust army instead. In fact, if it wasn't for the fact the grey Locust skin would be lost in the lunar-themed scenery of Bad Landing, I probably would have.

Anyway, that photo just up there is a snap-shot of my first test-miniature for the "Ork" force I'm building for Rogue Trader and Tomorrow's War. I've painted quite a few more of them since then, but dearly beloved is down visiting her mum for the holidays and so there'll be no more photo's till she comes home.

 Hope everyone enjoyed the holidays. Until next time.

Wednesday, 23 November 2011

In the Emperor's Name

Last night, I had the chance to lead my Imperial Guard squad in support of Gary's Inquisitorial Kill Team in my first ever game of "In The Emperor's Name," a set of skirmish rules based on GW's 40k Universe.

It is a simple, un-complicated and (best of all) free system which was frankly a delight to play. So much so that I've now been persuaded to follow up our successful rescue of a captured Throne Agent from the evil clutches of a Genestealer Cult by taking part in a new campaign.

Unfortunately, I didn't bring my camera with me to the game. But I shall do better next week, when we're having another practice game. Now that I've seen how my force works I have a few ideas about how to improve it. Alas, Commisar Savage, did not survive the first practice game, so my new force will be based around the very capable L.t Mason, who did survive the skirmish (and covered in glory too). I plan on adding an Ogryn and a sniper to my force for next week's game.

You can download this awesome little game and try it out for yourself, here: 

Look out for pictures and a game report soon.