Showing posts with label 40K. Show all posts

Saturday, 7 February 2015

8th Necromundan Regiment, Imperial Guard

Now that most of my (former )painting service back-log has been finished and posted out to customers I've been able to squeeze in an hour or two of painting my own miniatures. My old Imperial Guard army has been languishing since 5th edition and is due a revamp. Thing is, I'm completely uninspired by my old collection of guard infantry and feel the need for a complete re-start. At least where the human infantry elements are concerned.

Most of my existing collection is going to be consigned to continuing oblivion while I resurrect one of my first 40K armies from back in 1988: the 8th Necromundan regiment. The very same regiment that graced the front of the first ever plastic IG box 27 years ago.

I'm not going to go with the classic paint scheme entirely however. I've long since gone off the tiger stripe camo and metal helmets. However, Ill still be using a predominantly grey and black colour scheme, but with black helmets and webbing.

Ahh...sweet memories
I think one of the reasons I've "gone off" my current Guard army is their look. Although heavily converted with third party heads and the like, I've never liked the basic look of the Cadian models they're based on. I far preferred the look of the old Cadian metals. Fortunately, Victoria miniatures has come to the rescue with their "Arcadian" range. While clearly inspired by the old metal Cadians, there are clear influences from the 1988 box set as well, including the look of the lasguns (by the way I love that the name "Arcadian" harkens back to the old days of 40K lore as well).


The "Arcadian" miniatures themselves are lovely sculpts, and I've already ordered a couple of veteran squads and a CCS from the company. Combined with a few of my older GW miniatures and my soon to be repainted collection of vehicles, they'll hopefully make a fine start to my newest 40K army.


Thursday, 5 September 2013

Back to the 40K: CSM vs CSM Batrep.

Well, my plan of having a dedicated web-site for 40K didn't work out. I hardly ever posted anything on the new blog and it cut the number of posts in this blog down considerably.

So from now on, 40K is back on the menu at Terminus Omega. To prove it, here's a much shortened bat-rep of a game between my Khorne-themed CSM list and Luke's Slaaneshi themed list. I say much shortened, because the game was nearly six weeks ago now and I can remember very few details. Even with the aid of photographs to jog my memory. I do recall it was a big guns never tire mission.

My Army:
My army was Khorne-themed, with a Daemon Prince armed with "THE AXE" and a Chaos Lord on  a Juggernaut armed with a powerfist and a lightning claw. I had a strong unit of bikers with the Mark of Khorne and two melta-guns mounted on the bikes. I also fielded a Land Raider with a full complement of Berserkers (a change from my normal Possessed contingent) and eight Khorne Terminators with combi-melta's. To round things out I had ten chaos marines with plasma guns on foot, ten cultists and I used a Vanilla Marine razorback as a proxie for a CSM Predator with autocannon and heavy bolters. Finally, I had 150pts to spend so I fielded a unit of Thousand Sons.

Luke's Army:
Luke fielded a Slaaneshi Lord with the Burning Brand on a bike, escorted by a small squad of Bikers. His second HQ choice was a Daemon Prince of Slaanesh with maxed out spells including a lot of Biomancy. He also fielded two ten man Noise marines squads loaded with AP3 eating weapons, a ten man Havoc Squad with four autocannons, an Aegis Defence Line and a normal CSM squad with Mark of Slaanesh, BP and Close Combat Weapon.

He also fielded a Helldrake. Boo! Hiss! As if he didn't have enough AP3 already.

Deployment:
Luke positioned both units of Noise Marines in area terrain, one of them centrally. He placed his Biker Lord and escort behind the centre Noise Marines along with his CSM marines and DP. He placed his Havocs with his Aegis on my right flank. He held two objectives, one with his Noise Marines on the left, one with his Havocs (inside the defence line) on the right. He kept his Helldrake in reserve.

Luke's/Slaanesh Deployment
 I had one objective on my left behind a hill. Stupidly (and crucially) I'd forgotten that Thousand Sons were only troops in my Tzeentch list and so they couldn't actually hold the objective. Being so damnably slow, they then did nothing all game. I placed my Land Raider and Predator centrally along with the Bikes and Juggerlord. My cultists screened my CSM on the right. Seeing as Luke had the first turn, I kept my DP in reserve, hoping to use him to take out Luke's DP wherever he ended up.

My Deployment. Take BEFORE I remembered to place the Pred Proxie


Early Game:
Luke's first turn shooting was fairly ineffective. I had placed most of my army either out of range or out of LOS of his army. I only lost a single Biker to shooting because his wheel was poking out from behind a bus. I may have lost a cultist or two to some long range Havoc fire but that was it. I had no shooting at all to speak off. Turn two, his DP fries a few of my cultists AND my CSM's. With Havoc fire and the turn 2 arrival of his Helldrake that sealed the fate of both units who promptly failed morale and eventually ran off the table in turn 3 In return, I knock a few hull points off his Helldrake with twin-linked heavy bolter fire and Lascannon fire from the Pred and killed his DP with some twin linked bolt guns and melta guns from the bikers, who by this point were turbo-boosting in circles behind the bus.

Both DP's were flying at this point, but it's still a cool photo
Mid Game:

Luke's horde of AP3 firepower has nothing much left to shoot at apart from my vehicles (everything else being out of LOS) and does almost no damage. The Helldrake managed to Vector Strike the Landraider to no effect and then kill a few bikers with his fiery breath. In return, I shoot down the Helldrake with my Deepstriking Terminators and their combi-melta's, who now threaten the right hand Noise Marine objective. My Predator shoots across the board towards the objective on my back left because, as Heavy Support, it can capture objectives in this scenario.

To our combined delight, it turns out to have been a Skyfire Nexus all along! To only my delight, my DP with THE AXE charges the central Noise Marines and easily slaughters the Champion in a challenge. The Bikes move up for a charge next turn and blast away at the Havocs with their bolt guns and kill a few of the autocannon gunners.
My turn 3: DP Charges and kills the Noise Marine Champ in a challenge
In Luke's turn, his Chaos Lord and Bikers charge my Daemon Prince. The Chaos Lord has to challenge the Daemon Prince and who rolls a 1 for the Axe and wounds himself and takes another wound from Luke's Chaos Lord. My DP is now tar-pitting two whole units on his own. His Havocs kills a few Terminators though volume of fire. His Noise Marines on the left shoot at and destroy my Predator with a lucky shot. The Landraider moves up to threaten the Aegis Defence Line objective once the Terminators clear out the Havocs. It still has not yet disgorged it's cargo of 'Zerkers , mostly because I'm expecting Luke's Biker Lord to counter-attack the Terminators once they've driven off the  Havocs. The Zerkers would then counter-attack in turn.

His turn 3: Slaaneshi Chaos Lord and Bikers charge DP who rolls a 1 for The AXE
I then charge my own Bikers and Jugger Lord into the huge tar-pit around the Daemon Prince, hoping to clear away the central Slaaneshi units and open up a charge route to the Noise Marines on Luke's left. My DP kills the Chaos Lord. My Chaos Lord kills the Biker Champion. My bikers tear through Luke's Bikers, despite their initiative advantage.

My and Luke;s Turn 4: My DP kills Luke's Chaos Lord and my Chaos Lord on his Juggernaut kills his Biker Champion. Luke counter charges in his turn with the Close Combat CSM Marines who lose their Champion to my Lord.
Luke counters by charging into this huge melee with his Close Combat Marines, whose Champion promptly challenges my Chaos Lord and dies horribly to a Powerfist in the face. His close combat marines flee combat but rally. Meanwhile, I'm slaughtering everything in sight. My terminators charge home into the Havocs and route them, but lose more than half the squad in the process. They then occupy the Quad gun.

After shooting, this turned out to be a very easy Assault Phase for me.


Late Game:
Luke' Noise Marines on the left continue to stay put, knowing that if they break cover my AP3 Thousand Sons will have a field day. Meanwhile, my Thousands Sons stay put knowing that if they break cover the AP3 Noise Marines will have a field day.

On the other side of the board, we're busy annihilating each other. My Daemon Prince manages to kill itself by rolling another 1 with it's axe.
With 1 wound left my DP rolls a 1 for his Axe Attacks and kills himself. Bummer.
After which a series of bad dice rolls lead to the death of my Lord. Luke's remaining forces in the centre (half a dozen miniatures or so, including his rallied close combat CSM's) somehow manage to retake the Aegis Defence Line from my Terminators. My Zerkers then charge out of the Landraider and re-take the objective but fail to kill one model, leaving it contested. I try to zoom my Landraider across the board to contest Luke's other objective but it's too late.
These six marines somehow managed to kill all three Terminators before they could even strike back!

I've managed to snatch defeat from the jaws of victory and Luke wins with First Blood, one objective and Slay the Warlord. Meanwhile, I have Slay the Warlord and Line Breaker.

All in all a very enjoyable blood bath. Luke may have won on points but at the end of the day Khorne never loses. Because, you know, "Blood for the Blood God" and all that jazz.

Things to Remember:

Number One: (and this is the biggie that cost me the game) Thousand Sons are only troops in a list with a Chaos Sorcerer of Tzeentch.

Number Two: Even if your guys can't score on an objective, you should still move them forward the bloody half inch required to see what that mysterious objective is! It could be Skyfire.


Wednesday, 7 August 2013

Terrain Tutorial: Industrial Style Fencing

Another bit of relatively easy utility terrain. Great for blocking lines of advance (in some systems), creating storage areas, supply depots and even basketball courts.

You will need:
Superglue
Good Pair of Scissors
Sand
Milli-put
Fine Metal Mesh (I got my mine from the paper mache section of an art store. Car body mesh also works well).
Small, thin wooden sticks - toothpicks, coffee stirrers, anything like that.
Basing Materials - in my case I like to use cake trays, because they're good and thick and the foil-treated surface helps prevent the cardboard from warping.
Some of what you will need.
 Step One: Eat the cake. Yum Yum.
Cut the basing material into long thin strips about an inch wide. I've cut mine into 8 inch long strips because my mesh comes in eight inch sections, to save a bit of measuring. Once you've done that, place three blobs of milliput on the strip. One at each end and one in the middle. If you're using the cake tray, you'll need to superglue these down, otherwise the milliput won't take. Then cut you're wooden sticks to size (I like 75mm) and stick them into the milliput. Build up more milliput around the stick to help secure it in place. The sticks don't all have to be exactly the right length (or even straight) because the fence posts would subside over time.

After the first few steps you'll have something like this.
 Next, cut the wire-mesh. You want each strip to be as long as the base and as tall as the fence posts. In my case, that mean's 8inches long by 75mm high. Yes I'm mixing my measures here. I'm a child of the metric-changeover period. I work with both systems. Place more milliput lobs between the posts (remember that if you're using the cake tray you will need to glue them in place. Push the mesh down into all five blobs and use superglue to stick the mesh to the posts. You may find you need to use more miliput or blue tac to keep the wire stuck to the sticks long enough for the glue to dry.
More milli-put blobs added and mesh fence in place.

 Now you need to frame the mesh in place between the original posts and a second set of three posts. Again, secure them to the base using milli-put (and super-glue if using the cake tray). You'll often find the posts don't want to stay together and will branch out to form a V shape. Use milli-put and superglue to fix the top's of the two posts together.
Stick the two posts together with milli-put and super-glue.

 Remember to make a set of gates using two sets of four fence posts. I tend to make one gate base for every two or three bases of normal fencing.
Gates
Once you've assembled your fences, let the milli-put set over night before doing anything else.

Monday, 5 August 2013

Silo Build Part II -Painting

Part two of the silo terrain building article.

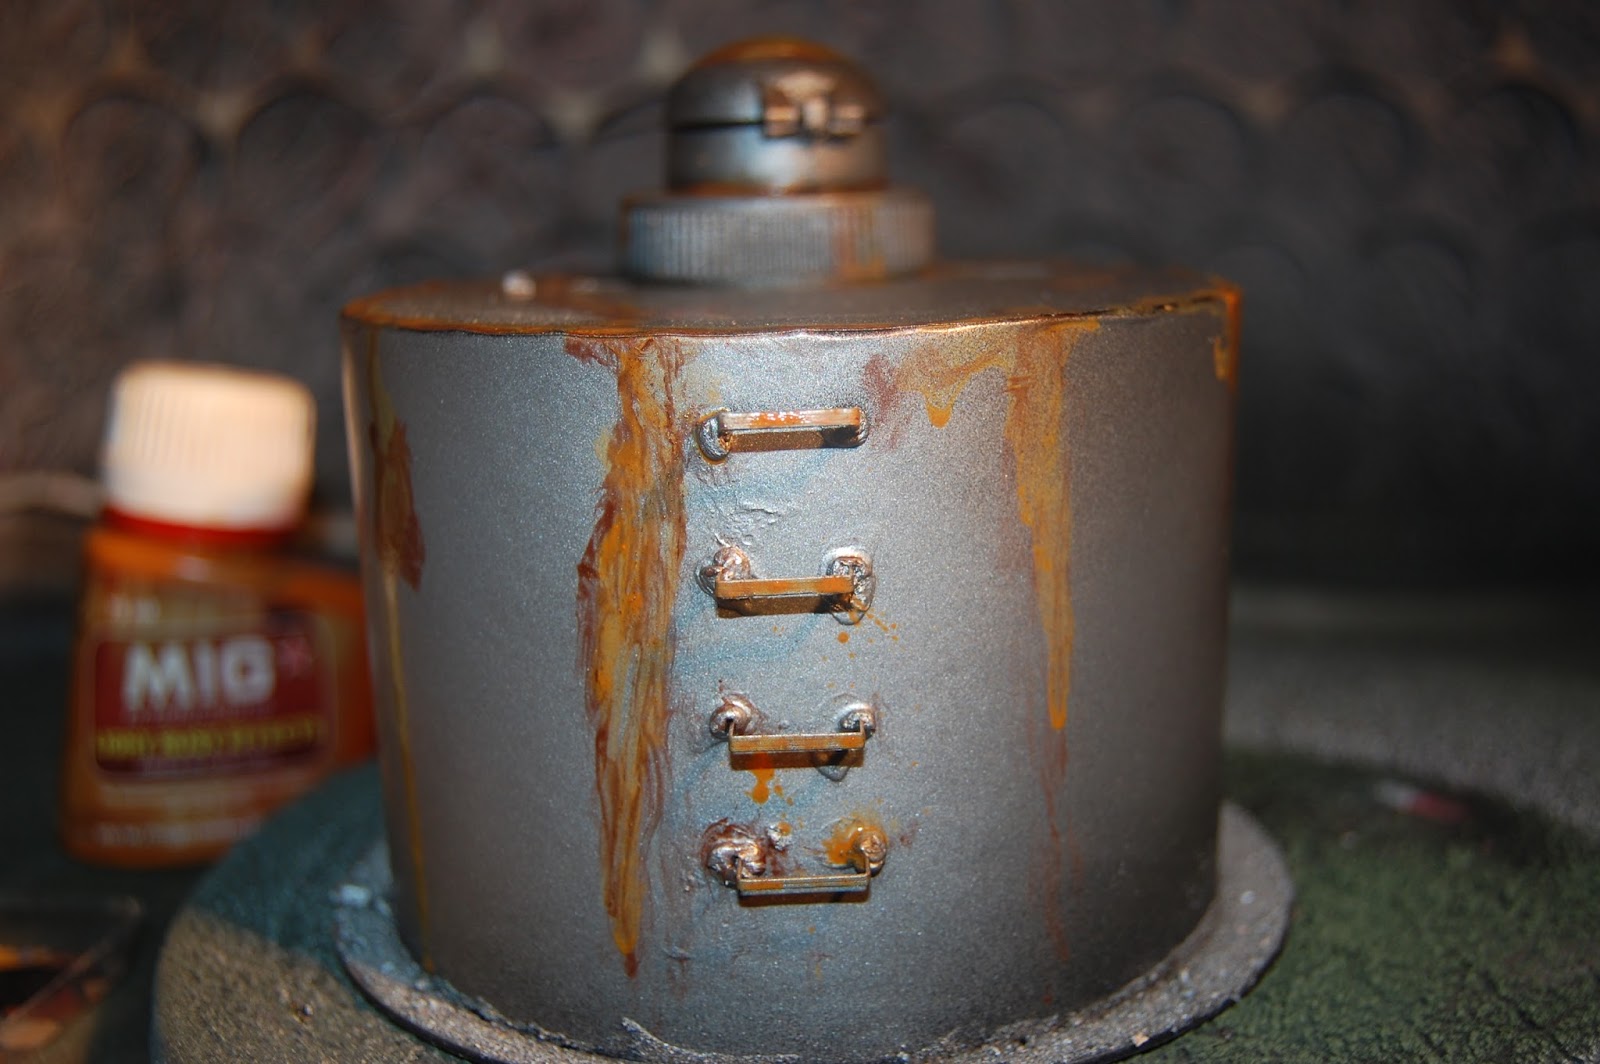
Taking a very old, stiff-bristled brush I half-stipled, half painted long streaks of Model Air Rust paint down the sides of the Silo and around the spot wields. If you don't have Model Air Rust, any dark brown/umber paint mixed with a metallic will do.

I did the same on the upper surface of the silo and around the rim, careful to make sure I applied the rust coloured paint anywhere water might collect in pools.

Taking Mig Light Rust Effects and using the same stiff brush I painted orange streaks over the rust-brown, being careful to leave the rust brown showing a the edges. If you don't have Mig Light Rust, then any bright orange paint will do the same trick. Just make sure to water it down to the consistency of ink first.

And again on the upper surface of the silo

At this point I did something stupid: I forgot to take a photo of the next stage. All I did was take some Games Workshop Armageddon Dust and, using my fingers, smudged it all the "clean", silver bits of the silo to represent years of dust storms and the like.

After adding the Armaggeddon dust, I overloaded my stiff-bristled, old brush with ink and, using painting down from the top of the silo to the bottom, applied it all over the silo, been careful to leave as many streaks and making the coverage as uneven as possible. 

With the Silo now looking like a rusty, abandoned piece of junk, I painted the base Vellejo Model Colour English Uniform and dryrbished with Vellajo Model Colour Green Ochre.

All Done. About 2 man-hours of work.

Sunday, 4 August 2013

Silo Build Part I


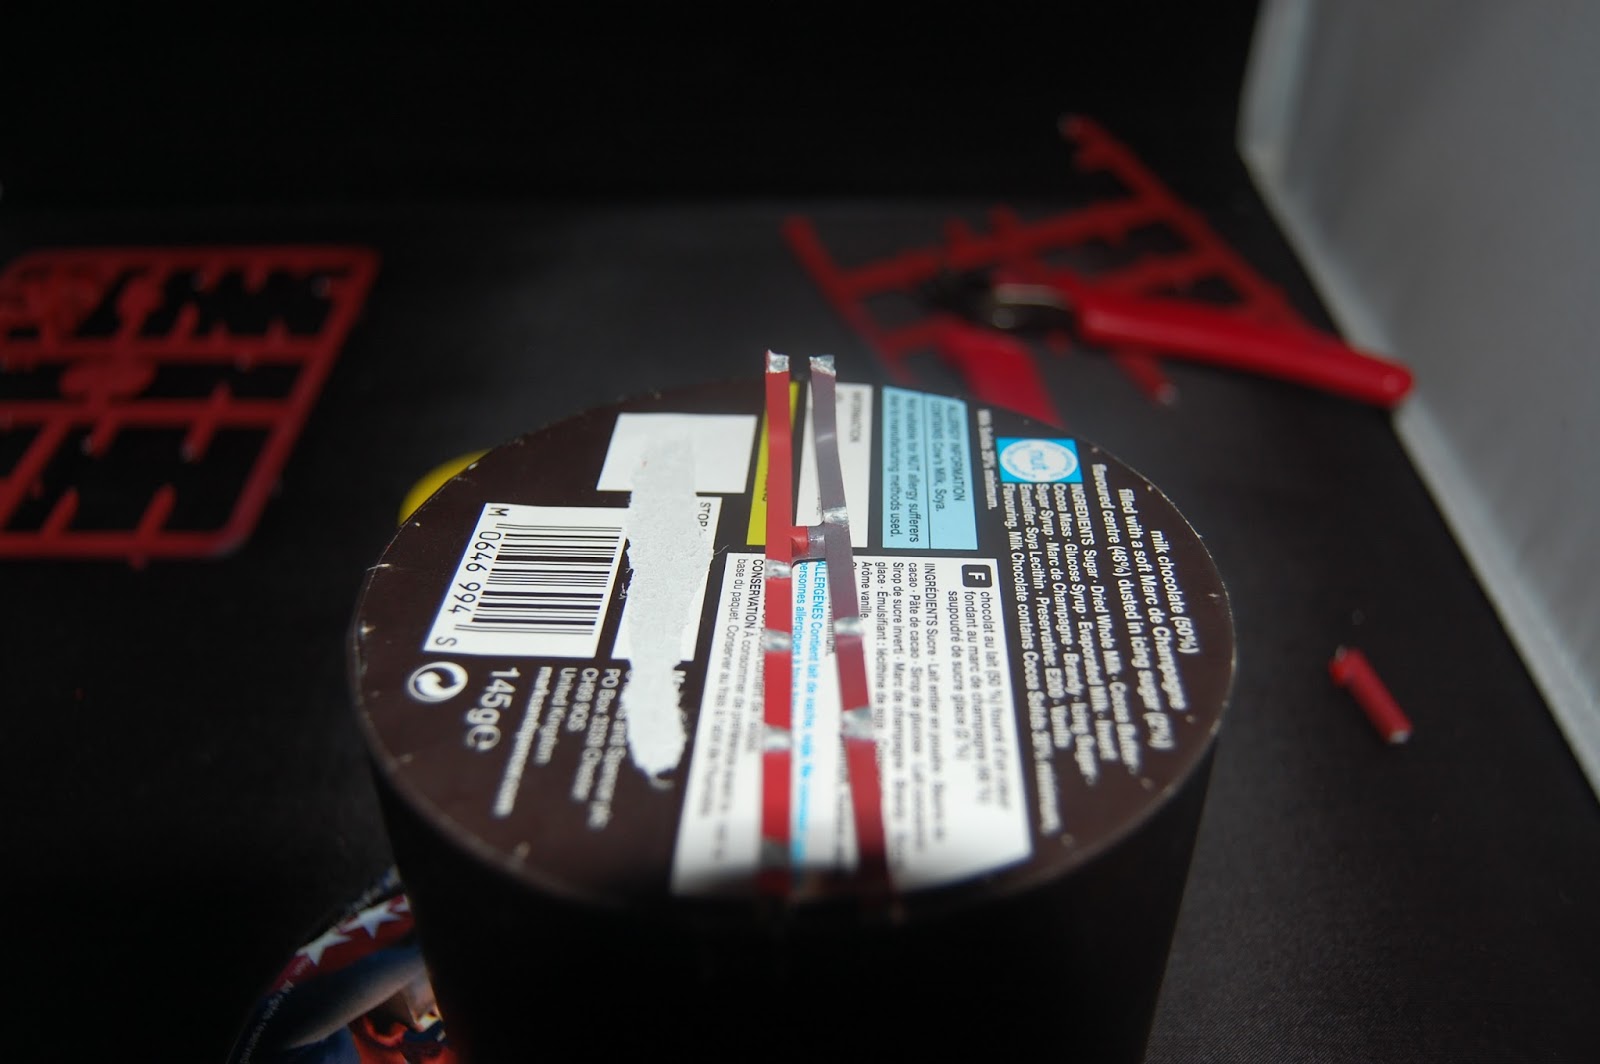
It's been a while since I knocked together any terrain to add to my collection. Inspired by a champagne truffle box, I decided it was time to add a storage silo my collection of 28mm Bad Landing/Post-Apocalypse scenery. I have a good number of storage silo's already, but they're better suited to 15mm scale or less. So it's time for me to fill this gaping hole in my scenery collection:

Parts: Sturdy round box, CD, Old Ink Pot Lid, Bottle Top, Old Spru's, Staples.

I first cut th sprus to length then glued them together, using the round "spacer" on the sprue as a spacer between the two "pipes".

Like this.

I super-glued the pipes to the side of the box, then glued the box to the CD.

I then super-glued the bottle top and ink pot lids in place to make a hatch. I made sure that the spru-pipes were flush with the bottle lid.

I used groups of three staples to make ladder rungs and super-flued them place. I used milli-put to make "spot weld" marks. The flock was glued to the base with PVA glue.
After spraying with a black undercoat, I lightly sprayed over the top with Army Painter Plate Mail Spray-Paint.


Wednesday, 27 March 2013

New Blog: The Orarian Heresy

After thinking about my last post for a few days, it dawned on me that a huge proportion of my gaming time over the ext couple of years will be focused on Warhammer 40K. It shouldn't have come as so much of a surprise given that I co-host a 40K Pod-cast, play in 40K Tournaments and spend about 75% of my working hours painting 40K miniatures (of the four army sized commission's I'm working on at the moment, two are 40K armies and I've already finished another 40K army order this month)

So, it makes sense to start up a new, 40K dedicated blog rather than spend so much time writing about 40K in what is (still) ostensibly a blog about old school wargames and 15mm gaming. If you've been at all interested in my infrequent 40K posts, please take a gander and follow the new blog, because there won't be any more 40K related posts on this one for a good while at least. Not for the modern edition of the game, anyway.

Hope to see you over at the Orarian Heresy blog.

Sunday, 24 March 2013

The 2 Year Plan 2013-2015

I don't really expect this to be of interest to anyone other me. It's just my way of organising my thoughts for what I want to accomplish from a wargaming point of view in the next 18-24 months. Hence I haven't bothered to include any nice photographs or images to break up this huge wall of text.

In no particular order:

Terrain Wise:

  • Upgrade the 4ft by 4ft terrain mats to 4ft x 6ft terrain mats to match the size of the new table. 
  • Make/acquire more 15mm and 28mm terrain for my Temperate, Off-world Colony and Post Apocalypse/Semi-Arid game boards.
  • In particular, get myself some nice 15mm Napoleonic terrain, modern North African terrain AND some rural russian terrain to use with both other sets of 15m terrain. Also modern terrain from Fieldworks which will look great as North and East African factories and apartment buildings.

Miniatures Wise:

40K Imperial Guard:

I'm really, really missing playing Imperial Guard in 40K. Although my Chaos Space Marines have only lost one game, drawn one game, and won every other game they've played quite convincingly, nothing can replace the IG as my favourite 40K Army. At the moment, I have squidgillions of infantry, but I had to sell most of my tanks before moving down south. So, I need to purchase:
  • At least one Imperial Guard Heavy Weapons Box with Lascannons.
  • Buy ten stormtroopers with Hotshot Lasguns to expand my five man suicide squads into full squads
  • Buy an Ogre Lead Bely boxed set and convert it to Ogryns
  • Convert a unit of Rough Riders.
  • About 15 pairs of Cadian arms and lasguns to convert the rest of my Dream Forge UAMC infantry into Guardsmen (well, conscripts)
  • Buy one Leman Russ Punisher (for Pasque)
  • Buy three Leman Russ with the twin autocannon variants
  • Buy three normal Leman Russ but also purchase the Plasma Cannon and Vanquisher turret variants from Forge world.
  • Buy one Basilisk (the enclosed armour one from Forgeworld)
  • Buy one Medusa (from Forgeworld)
  • Buy one Manticore

40k Space Marines:

I have an entire Space Marine army sitting around waiting to be painted and built. They're not my first choice of army by any means (after 25 years of playing with and against them, they bore the hell out of me). On the other hand, given how expensive it's going to be to make my IG army playable again I'm going to have to concentrate on getting these guys up to speed first so I can use them as an allied contingent with my IG infantry.
  • Assemble and paint the five remaining Terminators, five character miniatures and thirty pus space marines lying around doing nothing.
  • Buy, assemble and paint two Rhino's, one Land Raider Redeemer and one Land Raider Crusader.
  • Play games using these guys as an IG allied contingent (and vice versa) so my IG become a playable force again.

40K Chaos Space Marines:

  • Buy, assemble and paint an actual Chaos Landraider and stop using the normal Space Marine Landraider as a proxy
  • Swap out the Hellbrute from my 2000 pt list and replace it with a twin-linked Lascannon Predator Tank.
  • Paint up the five Thousand Sons, one Possessed and one Chaos Space Marine Champion I need to declare this army fully painted. Optionally paint up the other 6 bikes and bikers and two Chaos Lords on Juggernauts as well. Although it's not really necessary, they'll give me more options to play with list wise.

15mm Napoleonic:

After playing Napoleonic's for the first time in about fifteen years a few weeks ago I'm all fired up for more. To start with, I've picked one of the smaller nations who fought on both sides of the conflict (Bavaria) because of the many options it will provide in terms of armies to fight and also because assembling the entire national army of such a small(ish) state in 15mm is a reasonable enough goal. That's 11 regiments of Infantry (two battalions of 12 miniatures each) and a half dozen regiments of cavalry plus a few guns. Still a major undertaking, but not quite as daunting as trying to assemble the entire army of France.

Alternate History/Ultra Modern:

Despite my rant the other week about comfort zones, I really am attracted to ultra-modern game -just so long as fictional forces and nations are involved. Hence, in the spirit of Alcovia, Franonia, Raynonia and Bravo's Evil Empire, I'm inventing my own fictional nation to fight fictional campaigns against other fictional nations. I need to purchase:
  • North African and rural Russian type scenery (sounds a bit of an odd combination but it'll make sense when I do a feature on my fictional nation).
  • A mixed platoon of ARVN and US Vietnam era troops, plus seven M113's and a few M60 tanks to represent the armed forces of my small, third-world nation for games of Force on Force. All from Peter Pig, (except the tanks) which means £18 for the troops, £56 for the APC's and £8 per tank.
  • Paint up my GZG 15mm civilians as oil workers, consultants and other civilians for games of Force on Force.
  • Purchase a whole heap of Peter Pig AK47 miniatures to represent various bad guy militia's and shady foreign nations.
  • Use Israeli Sand Grey for the armour. Buy it from here: https://airbrushes.com/advanced_search_result.php?keywords=israeli+army&search_in_description=1&categories_id=202&inc_subcat=1

Post Apoc:

Through it all, I'll continue to build up my PA terrain collection (especially as it also doubles up as my 40K terrain collection) and paint up the many existing PA miniatures I already own as time and inclination allows. I'll be using these for my PA solo games as well as my Judge Dredd solo-campaign that I plan to play every now and then.


Wednesday, 9 January 2013

Saying Good-Bye to the old Fire Magnets

I've come to a difficult decision earlier today. I've been humming and hawing about it for a while, but in the end I decided it just had to be done. I'm parting with some old treads.

The four armoured vehicles in the post below were painted for my Imperial Guard army, and ended up getting painted red despite the fact my troops eventually ended up suitably garbed for sandy desert conditions. Given that I've never been a huge fan of the current IG infantry ranges available anyway, I've been considering getting rid of the entire army and -rebuilding it using Mantic Corporation troopers instead. But while I'd probably make more from selling a complete army rather than four individual vehicles, I can't bear to part with my IG infantry just yet.

Maybe when all those Mantic ones are painted though....

So here they are, a final look at four Imperial Guard vehicles that I don't think I ever got around to posting on this blog anway.

They're up on eBay by the way. If anyone's interested, leave a comment and I'll send you a link


They're up on eBay by the way. If anyone's interested, leave a comment and I'll send you a link.

So long guys. You Chimera's weren't much use, but those Leman Russ' nearly won me a battle or two.

Saturday, 29 December 2012

Battle Report: Black Templars vs Chaos Space Marines


Back from Holiday and already it looks like January is going to be a busy (and therefore) a very happy month for Lead Legion.
As I've been on my hols, I don't really have anything to post up (yet) miniatures wise, but I thought I'd share a video battle report of my recent game with fellow pod-caster Liam. Liam has been taking part in a challenge called 50 games in 50 weeks featuring video battle reports of his three main 40K armies at work. In this battle-report, he takes on my Chaos Space Marines.
I'm the babbling fool in the brown hoodie, by the way

Friday, 23 November 2012

40K Tzeentch CSM List: 2000pts


Daemon prince of Tzeentch


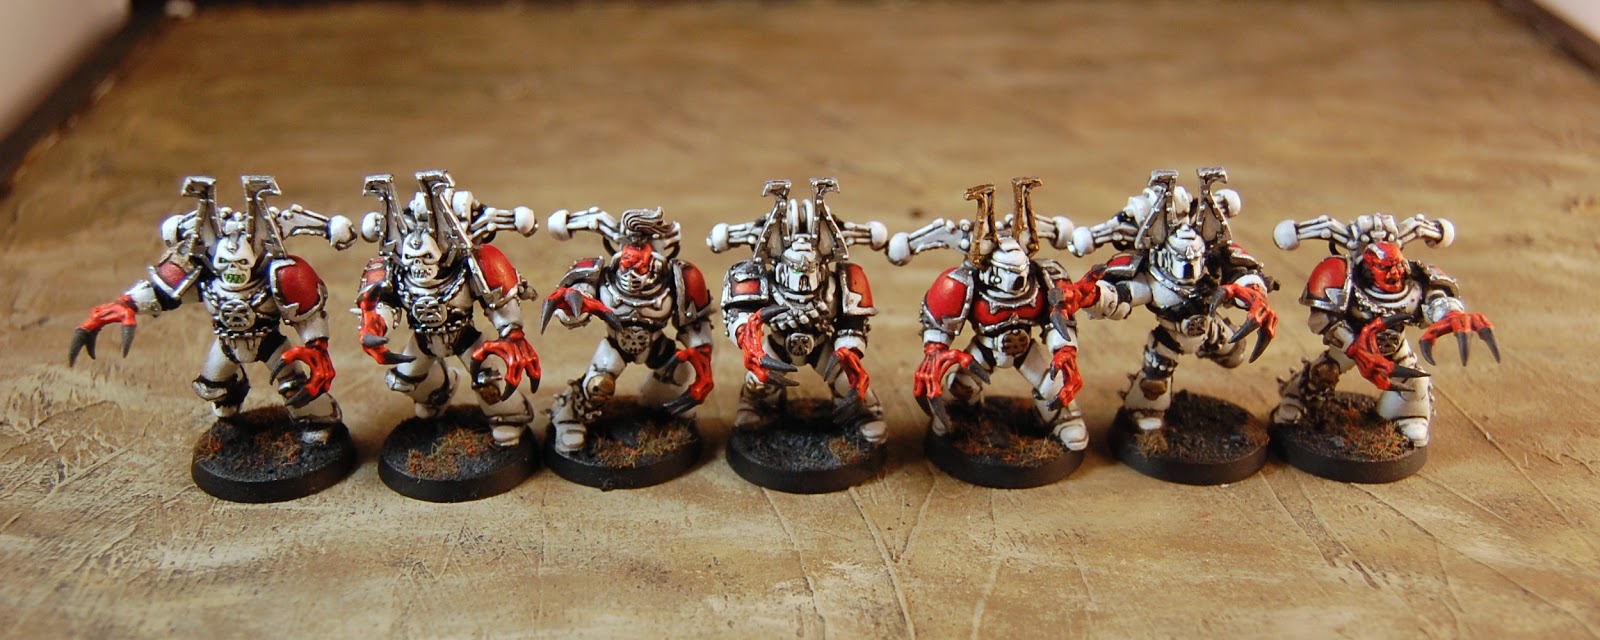
You don't see all that many Tzeentch themed CS lists out there. Here's a list that (unusually for me) I've had quite a bit of success with over the last few weeks. It has a total of seven mastery levels worth of psyker abilities (3 for the Sorcerer, 3 for the Daemon Prince and 1 for the Aspiring Sorcerer) and a total of  20 models with Invulnerability saves. I normally assign two Telepathy powers to the Socerer (hoping for puppet master of invisibility) and two Biomancy or Pyromancy powers to the Daemon Prince.

The Daemon Prince is an expensive model, but he's performed well in every game so far (except when my opponent can call on a Str 10 weapon for instant death -like Tau). Even without stat boosting psyker abilities, he's a demon in close combat -having nearly killed a Bloodthirster in our last game.

The Thousands Sons and the Cultists are purely for holding down objectives. The cultists pretty much go to ground for the whole game and hang on. The Thousand Sons are surprisingly effective objective holders. Few power-armoured opponents want to get too close to four rapid firing AP3 Boltguns and a pskyer and other armies tend to ignore them until it's too late (probably because the unit seems too small to worth bothering with in the early game).

The CSM squad is there to capture enemy objectives. The Terminators normally deep strike in near an enemy vehicle, trash it, and then contest objectives. They're job is too look big and frightening on the side of the table while they're in reserve (hopefully forcing my opponent to keep back a few units in his deployment zone) and seem even more scary so that the real denial troops (the Bike Squad) can get in close.

I use the bikers like I would shock cavalry. They zoom up the board using turbo-boost to get close to an enemy vehicle, melta it to death and then assault objectives and/or troops in the open.

The Possessed ride the Landraider and are the only troops in the army with a Mark other than that of Tzeentch. In this case, the mark of Khorne. Possessed were viewed as a joke unit in last edition, and several of my opponents have made the mistake of thinking they're not that scary -until they chew through a terminator squad or death company assault squad in a single assault phase. I generally aim these guys at the biggest, meanest close combat unit or HQ the enemy has and let rip. And with Str 5, don't forget they can take down vehicles very easily too.


HQ:

Chaos Sorcerer of Tzeentch

 Chaos Sorcerer of Tzeentch:

Power Armour, Bolt Pistol, Force Weapon, Frag and Krak, Aura of Dark Glory 15pts, Mark of Tzeentch, Mastery Level 3, Veteran of the Long Wa
Cost: 145 pts.

Daemon Prince of Tzeentch:
Close Combat Weapon, Daemon of Tzeentch, Wings, Power Armour, Mastery Level 3
Cost: 295 pts.

TROOPS:

10 Chaos Space Marines:
Inc 1 Aspiring Champion with Boltgun and Close Combat Weapon, 2 Chaos Space Marines with Plasma Guns, 7 with Boltguns. All have Veterans of the Long War (10pts), additional Close Combat Weapon, Power Armour, Bolt Pistol, Frag and Krak.
Cost: 200 pts.

10 Cultists:
Including one Cultist Champion with Shotgun, 1 Cultist with Heavy Stubber , 3 cultists with Autopistol and Close Combat Weapon, 5 with Autogun.
Cost: 62 pts.

5 Thousand Sons:
Including 1 Mastery Level 1 Psyker with Bolt Pistol and Force Weapon. 4 Thousand Son's have Boltgun. All have Power Armour, Inferno Bolts, Mark of Tzeentch and Aura of Dark Glory .
Cost: 150pts.
Chaos Space Marines

ELITES:

5 Chaos Terminators:
Including Terminator Champion. 1 Terminator has Reaper Autocannon . All others have Combi-Melta gun. All have Terminator Armour and  4 have Powerfist .Champion has Lightning Claw. All have Mark of Tzeentch and Veterans of the Long Waf
Cost: 273 points

8 Possessed:
including Possessed Champion. Mark of Khorne, Veterans of the Long War ,  All have Power Armour and Close Combat Weapon.
Cost: 274 pts.
Possessed Chaos Space Marines

HEAVY SUPPORT:

Chaos Landraider:
Twin Linked Heavy Bolter, Twin-Linked Lascannons, Seach Light, Smoke Launchers, Dirge Caster
Cost: 235points.

Chaos Predator:

Twin Linked Lascannon in turret, Lascannon Sponsons, Combi-Bolter
Total Cost: 145 points

9 Chaos Bikers:
inc Biker Champion, Exchange two twin-linked bolter exchanged for Melta Gun mounted on Bike . Others have twin-linked bolters. All have Power Armour, frag, krak, bolt pistol and close combat weapon as well as Veterans of the long war
Cost: 211 points

TOTAL COST OF ARMY: 1999 points.


Wednesday, 1 August 2012

40K Kult of Speed vs Imperial Guard Gun Line

Played my second game of 6th ed 40K last night against Charles and his Kult of Speed. Although there are no photographs (lighting conditions in the hall are terrible for photographing battle-reports, mostly due to a very high ceiling) Charles took the time to write up a quick battle report earlier today.

And here it is:

Charles' Battle Report:

With the arrival of 6th edition, a certain element of the spring clean is in the air, as players renovate their forces. Myself and my opponent for this game were no exception, as I decided to change my foot horde Orks to a mechanised Kult of Speed, while Brian took his guardsmen out of their Chimaeras and sent them out to fight and die via shank’s mare. Thus we were both trying out a new playing style, and it was interesting to see how they interacted.

The board was a cityfighting one, very beautiful at that, with my right flank anchored by the sea. We fought The Emperor’s Will on a Dawn of War deployment. I got to choose the deployment zones, and selected the one with the highest ruin (so as to deny it to the enemy guns), while each of us chose to put our objective inside a ruin of some kind.

The forces were as follows:

Imperial Guard

HQ
Command Squad (50). Two Flamers (10), Regimental Standard (15), Heavy Flamer (20), Master of Ord (30) Total: 125 points.

Troops:
Platoon HQ (30) plus four Grenade launchers (20)
Squad (50) with Grenade Launcher(5) and Heavy Bolter(15)
Squad (50) with Grenade Launcher (5) and Autocannon (15)
Total: 190pts.

Veteran Squad (70) with 3 Plasma Guns (45) Total: 115pts

Veteran Squad (70) with 3 Melta Guns (30) Total: 100pts

Veteran Squad (70) with 3 Melta Guns (30) Total: 100pts

Heavy Support:
Leman Russ Battle Tank (150) plus Lascannon (15) and Heavy Bolters (20) Total: 185

Demolisher (165) with Lascannon (15) Total: 180

Total Cost: 996pts

Orks

HQ:
Big Mek, Kustom Force Field, Cybork Body - 95

Troops:
Gretchin – 10, with a runtherder – 40
Skumsnik’s Boyz – 12, with a Trukk (Reinforced Ram, Red Paint Job) and a nob (Bosspole, ‘Eavy Armour, Powerklaw) – 167
Shakgor’s Boyz – 12, with a Trukk (Reinforced Ram, Red Paint Job) and a nob (Bosspole, ‘Eavy Armour, Powerklaw) - 167
Grotgul’s Boyz – 19, with a nob (Bosspole, ‘Eavy Armour, Powerklaw) – 164

Fast Attack
Warbikers – 3, with a nob (Bosspole, Powerklaw) – 115
Dakkajet – Extra Supa-shooters, Flying Ace – 130

Heavy Support
Battlewagon – kannon, two big shootas, reinforced ram, red paint job, armour plates – 120

Missions, Set-Up and Deployment:

Brian won the roll for deploying, and decided to go first (funny, that). He refused his right flank, and castled up in three ruins, with his company command squad sitting on the left flank, which was anchored by the sea, and his right by a Platoon Command Squad and the Leman Russ. He had good sightlines forward. I deployed the three vehicles and bikes facing directly at his Leman Russ Demolisher, with one of the trukks hidden behind the pillars of a building. The bikes hid behind a trukk. The whole army was in the KFF bubble, except for the Gretchin who were sitting in a ruin with walls so high that they couldn’t actually be seen by the guardsmen.


First Turn:

The first turn started with all of the Imperial Guard squads moving and running forward, so that they were in front of the tanks, command squads and heavy weapons. The shooting phase seemed to last an age for my poor Orks, but some lucky rolls on my part for the KFF ensured that the vehicles were all capable of movement, albeit with 2 hull points lost on the left-most trukk.
I surged forward, in the world’s shortest movement phase: the left trukk raced over a crater towards the platoon command squad. The battlewagon and bikes gunned forward, and the right trukk sat between the two of them. In the shooting phase I opened up with the bikes onto one of his squads in the open, but Brian passed all of his saves. The battlewagon and shoota boyz inside unleashed a fusillade, killing some guardsmen from a squad directly in front of them, but it wasn’t much. Meanwhile, both trukks went flat out, so that the left trukk was lurking behind a ruin in front of his platoon command squad, and the right trukk had weaved through the bikes and wagon to end up in front (being the eager scamps that they are).


Second Turn:

The second guard turn started with almost no movement beyond some shuffling on my left, to bring some meltaguns closer to the left trukk. The guard squads all tried their absolute best to destroy the trukks so that the big guns could obliterate them, but Brian’s luck (and the KFF) conspired to ensure that this was but a dream. In the end, he managed to blow up the right trukk with his demolisher, killing one of the boyz inside in the process. I was just about to triumphantly start my turn when he remembered that he had a Master of Ordinance, who duly proceeded to simply erase nine of the poor Snumsnik’s ladz from existence. The survivors (all two of them) managed to pass the relevant saves.

The Ork turn two started with a failure to bring on the Dakkajet, directly due to Brian’s warlord having the strategic trait that made my reserve rolls harder. Shakgor’s boyz on the left flank leapt out of the trukk, eyeing the platoon command squad. The bikers moved towards the Imperial Guard squad in front of the platoon command squad. The two ladz from the destroyed trukk hoofed it over a crater to threaten a veteran squad in front of them, while Grotgul’s ladz and the big mek disembarked from the battlewagon to attempt a multi-charge on a veteran squad and the guard squad with the autocannon.

In my shooting phase, I had to be careful not to kill things that I wanted to charge, but it still went quite well. The bikes took revenge for the trukk by mowing down the guard squad in front of them with gay abandon, with the left trukk adding in its firepower, leaving the squad all dead. The battlewagon fired all it had at the company command squad, killing one member (the heavy flamer). Shakgor and Grotgul refrained from firing, but Skumsnik managed to kill one guardsman in this phase. In the assault phase, Grotgul’s ladz failed to impact both squads, losing two of their number in the process, but still wiped out the veteran squad that they did impact. Shakgor’s ladz on the left flank managed to eradicate the platoon command squad, consolidating into the ruin, while Skumsnik and his lad (singular) charged the squad in front of them. He snipped the sergeant apart in the challenge, but I lost the boy to his guardsmen, leaving only him to face down seven of them.


Third Turn:

Brian’s third turn saw his tanks revving their engines to move 6” away from the nearest boy squads, and his command squad move forward to use its flamers. The shooting phase saw half of Grotgul’s ladz gunned down by the autocannon, the heavy bolter, the flamers and the demolisher cannon, even as the leman russ in the middle of his lines failed to kill the yellow boyz. Once again, as I was about to celebrate a successfully survived shooting phase, Brian remembered his master of ordinance, who duly proceeded to render unto death eight of the nine ladz in Shakgor’s mob, the nob himself included; the survivor fled (understandably). In melee, Skumsnik got himself killed.
At the start of my turn, I successfully brought on the Dakkajet, much to my relief. Brian still had both tanks and the Master of Ordinance, who was butchering me, while I was down to one effective mob, the bikers, and two empty transport vehicles. The Dakkajet aimed squarely at the Company Command Squad, while the warbikers throttled past the leman russ and Grotgul’s boyz pounded forward towards the squad with the autocannon (who were holding the objective).

In the shooting phase, Grotgul’s ladz killed half of the autocannon squad, while the trukk and battlewagon fired at a veteran squad beside the heavy bolter squad and killed all but two. The Dakkajet gunned down the company command squad, to jubilation from all the surviving ladz.

In assault, Grotgul’s mob charged and finished off the autocannon squad, thus holding Brian’s objective, while the warbikers destroyed the leman russ. However, horror of horrors, the explosion managed to put two wounds on the squad, which killed the nob (the only model in that squad who could harm the demolisher).


Fourth Turn:

At the start of Brian’s fourth turn, I was fairly confident of victory, but he consolidated his remaining firepower to pound Grotgul’s squad, killing every one of them except the nob and two buddies; the big mek fell in the fusillade. This left me with only two ablative wounds on the only model left able to kill the demolisher, and no real hope of claiming his objective properly.

I had to send the Dakkajet away on my turn, as I’d placed it poorly and it now couldn’t see anything. I sent Grotgul at the demolisher in a desperate attempt to kill it, while the trukk and warbikers eyed up the heavy bolter squad. Firepower from the battlewagon, trukk and warbikers pounded this squad, but they held with most of their number intact. In assault, I charged the warbikers into that squad, but poor luck on my part saw both bikers dispatched by overwatch and melee attacks before they could do anything. Grotgul had better luck however, managing to destroy the demolisher without blowing his squad to smithereens.


Fifth Turn:

The fifth turn didn’t see much movement in the guard ranks, as Brian sought to kill off my remaining troops on his side of the board. This he did handily, but he had not managed to do anything to my circling vehicles.
I began the festivities of my turn by bringing the Dakkajet back on from Ongoing Reserves, and aimed it towards the guard squads. The battlewagon tank shocked the two remaining squads (two veterans and the heavy bolter squad), forcing them both out into the open. In the shooting phase, I then managed to kill one of the veterans and leave the guard squad pinned and down to two men. It felt nice to be the one dominating shooting, for a change, even if night fighting had now fallen.

We rolled for an extra turn, and got it.

Sixth Turn:

The sixth turn was short: Brian moved the veteran onto the objective, and I promptly killed all three of his guys to win by tabling.


Charles' Conclusion:

The game was very close, with the guard firepower pounding the utter crap out of my Orks and leaving me with too few guys to kill his units. I worked out afterwards that I had 47 infantry models to Brian’s 60, which wasn’t a very good ratio for me. In hindsight, I was lucky not to have lost my trukks on turn one, and also lucky that he didn’t get to ordinance more than one squad out in the open. Kult of Speed is a new playstyle for me, and it is quite terrifying to have so few models; I am inclined to wonder if the warbikers, battlewagon and dakkajet are just too many toys at this points level. Brian’s army performed quite well, putting a formidable amount of firepower out, and even killing Orks in melee. Overall a very enjoyable game, and damned close too.

Brian's Conclusion:

It really was nail-bitingly tense right to the bitter end. My Master of Ordnance was worth his weight in gold. For only 30 points, he more or less wiped out two boyz mobs on his very own. If he hadn't been on the ball (hitting every time) the story would have been much different. Considering that the MoD has a 3D6 scatter on a miss and how close the boyz were too my own lines at this point, I could have been wiping out my own squads.

When I killed the last of his boyz in turn 5, I thought I'd be able to force a draw. I'd neglected to target the 40pt gretchin squad holding his objective throughout the game because I always had something better to shoot it to preserve my own forces. My plan had been to kill the trukks by turn 2 and pound the hell out of the grotz with blast weapons from turn 3 onward and to deny my own objective to the Orks. Either by killing all the Boyz or keeping hold of it myself. The fact I wasn't able to kill all those vehicles in the first two turns (as I'd expected) put paid to that idea. I hate  Kustom Forcefields.

That Big Mek was definitely Charles' ork of the fight.

Things I need to consider:

  • Don't forget to use the Master of Ord in turn 1 when all those juicy vehicle targets are parked close together.
  • Don't use the MoD so close to my own lines. I was lucky. Very lucky.
  • I need something to threaten fliers more effectively. I can't rely on Warlord abilities and being jammy enough to set up an autocannon on a mysterious objective that turns out to be a Skyfire control centre. 
  • Bring it' Down would have been a more effective order than First Rank, Second Rank, in turn two. I'd counted on my Plasma Guns, Melta Guns, Krak Grenades, Tanks and Platoon HQ to pop at least two trukks that turn, and wanted to make sure my remaining guard squads could put down enough fire to reduce the transported boyz inside to ten figures or less to force a rout test. I should have gone for Bring it Down instead and worried about chopping up the boyz later. 
  • My Company Squad with the two flamers and the heavy flamer was deployed too far back at the beginning of the game. I'd reckoned on using them to wipe out ork squads that cut through my front line. They might have done better being in my first line (rather than my second line) from the start. As it was, they fired their flamers just once all game.
  •  Use the last four points to buy bolt pistols for my Company Commander and Platoon Commander. Las pistols really, really suck.